Uploading Content to your cPanel
1. Accessing Domain and Root Settings
- First, open your cPanel and log in (for a guide on how to do this look here)
- Select "File Manager" from the "File" sub-menu
- Next find the domain in the table that you wish to upload content too, then select the "Document Root" link.

If you have a domain but don't see this in the list, you may need to add this to your cPanel.
You can find a guide to help you do this here.
2. Uploading Content
- Find and select the "upload" button at the top of the page

If you want to store your files in a folder, click the "Folder" button first to create and name your folder - On the next page. If you're on a desktop you can drag and drop your files onto the screen. Or just press the "Select Files" button
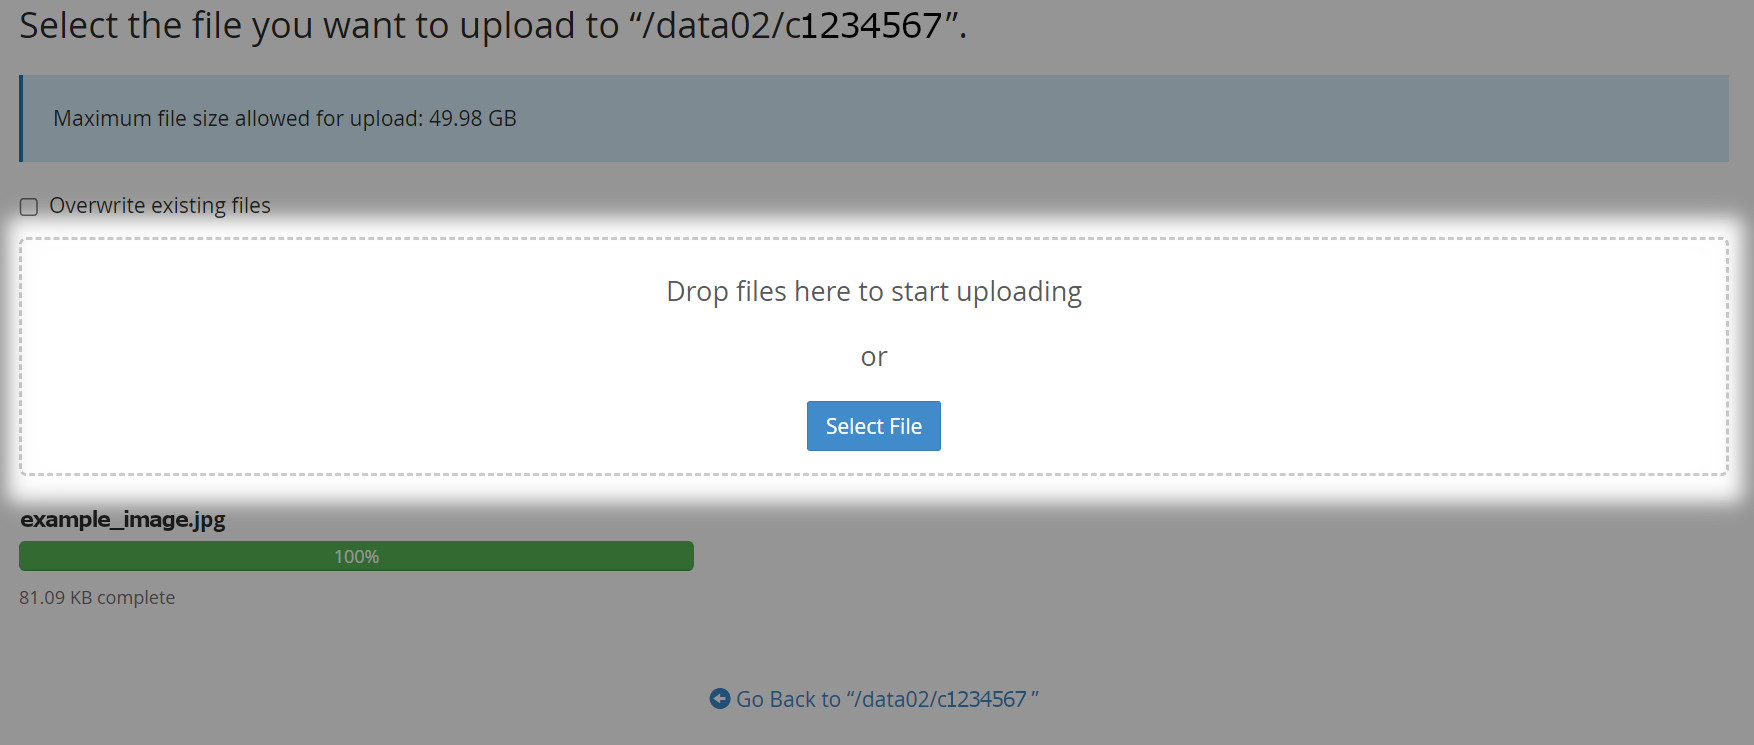
- Any files added will automatically upload, and the progress of each file can be seen below

2. Setting up an FTP Account
If you're looking to access the content you've uploaded, we'll show you how to setup an FTP account on your cPanel:
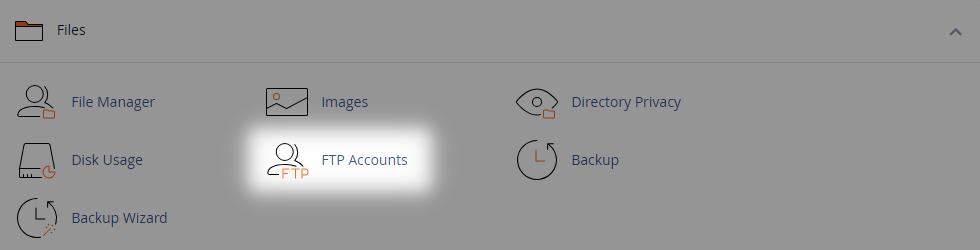
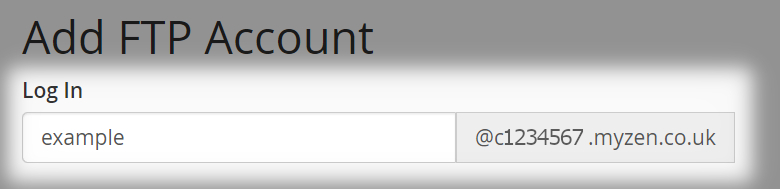
- From the cPanel tools menu, select "FTP Accounts" from the "Files" sub-menu
- When entering the details for you FTP Account, for the "Log In" enter a friendly log in name you'll use as a username to access your content
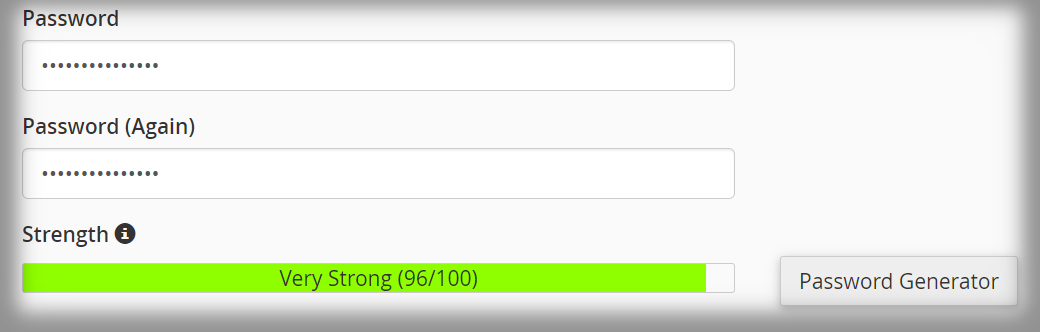
- You can either generate or set a "Password" at a strong or very strong level on the provided indicator
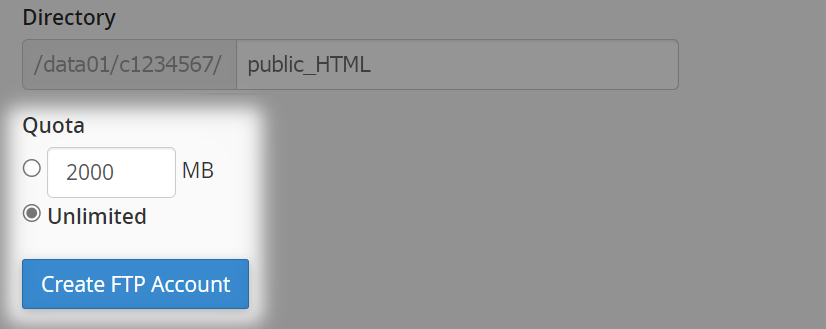
- For the "Directory" set this to the place you've placed your content, leave this as default if you just uploaded your content to the file manager, or if you put your content into a folder you can put this here
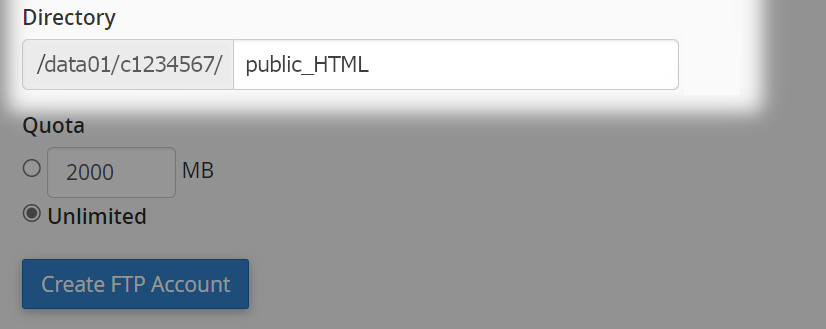
- You can set a "Quota" in MB if you have limited room on your cPanel, or set this to unlimited usage
3. Using your FTP Account
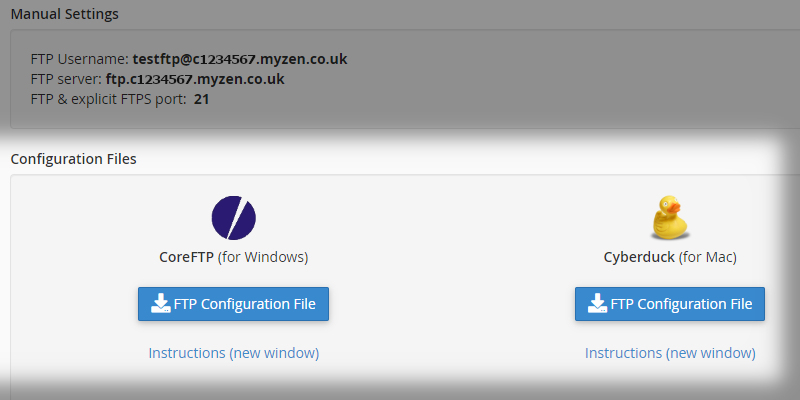
- Now the account is setup, to view your FTP settings click the "Configure FTP Client" button

- You can find all the settings you need under "Manual Settings"
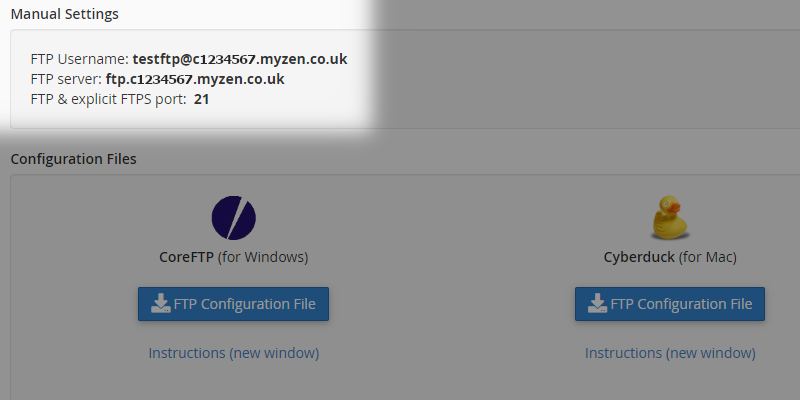
- You'll need to enter these into your FTP client of choice. cPanel recommends some clients for different operations systems however you can use any client of your choosing