Setting up Zen Mail on a Windows PC
Before you Start
To setup Zen Mail, you'll need your email account and server information.
If you don't have this you can log into My Account or follow the step-by-step guide here to find it.
1. Downloading/Installing Mozilla Thunderbird
If you do not have Mozilla Thunderbird already installed on your Windows device, you can download the latest official version from the Microsoft Store.
- Open the Microsoft Store application on your Windows PC

- Type "Thunderbird" in the Microsoft Store search bar
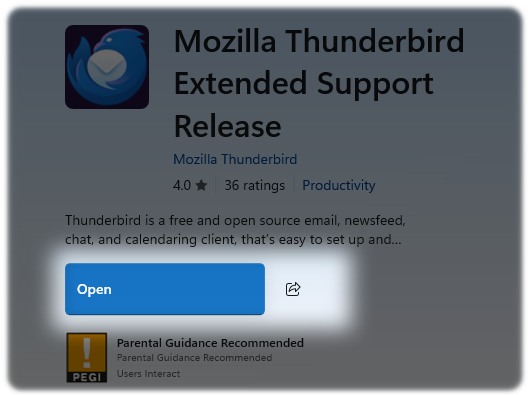
- Select "Mozilla Thunderbird Extended Support Release" App

- If you don't already have the App, download it. Once it's downloaded, open the app
2. Entering Account Information
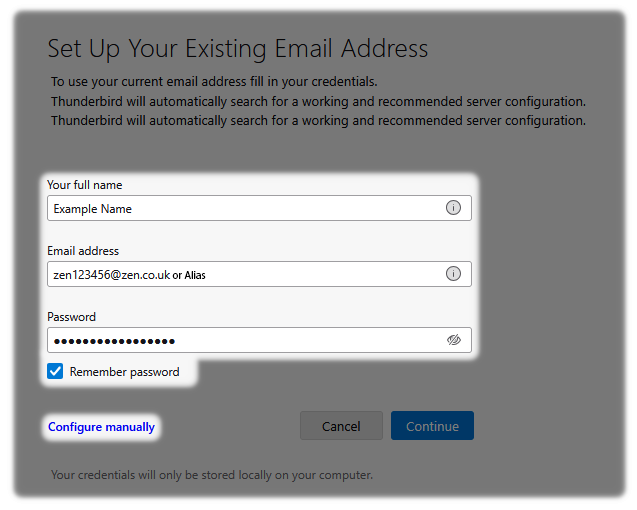
Once the app is open, you'll need to enter some account information:
Name: enter the name you wish to be presented on your emails
Email - enter your email alias, if you don't have an alias enter your email username
Password - Type in the password for the email address
For help on finding your Zen Mail Username and Password you can read this guide here.
Ensure to tick the "Remember password" box
Now select "Configure manually"
3. Server, Port Settings and Encryption
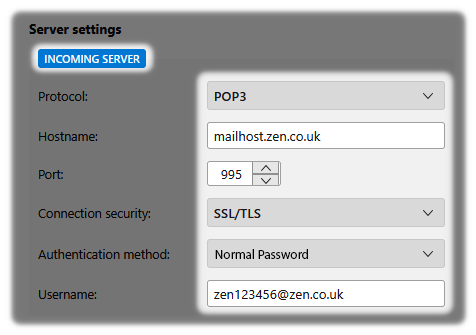
At this time an account verification step should fail. Rest assured this is a good thing and we just need to enter the following Zen Incoming Server details:
- Protocol - Make sure POP (POP3) is selected
- Hostname - mailhost.zen.co.uk
- Port - 995
- Connection security - SSL/TLS
- Authentication method - Normal Password
- Username - Type your Zen Mail Username
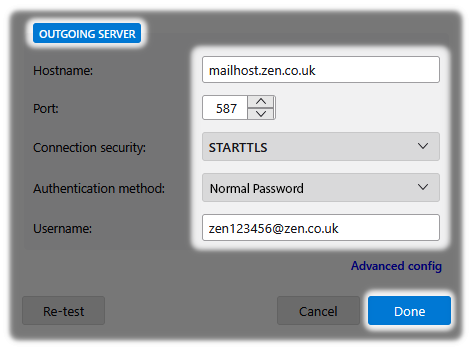
For the Outgoing Server enter the following:
- Hostname - mailhost.zen.co.uk
- Port - 587
- Connection security - STARTTLS
- Authentication method - Normal Password
- Username - Type your Zen Mail Username
For help on finding your Zen Mail Username, you can read this guide here.
- Select "Done" to proceed
4. Checking the Delete From The Server setting
We need to ensure that emails are removed from the server to ensure free space is available for new mail.
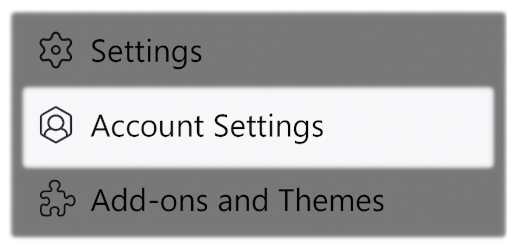
- Select the Menu icon at the top right of the Thunderbird App

- Then select "Account Settings"
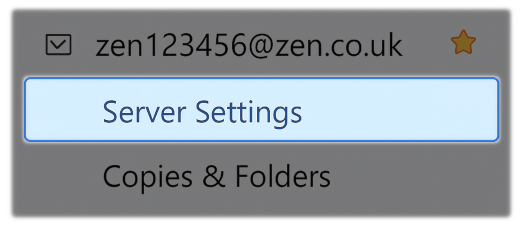
- Now select the account you've just created, then select "Server Settings"
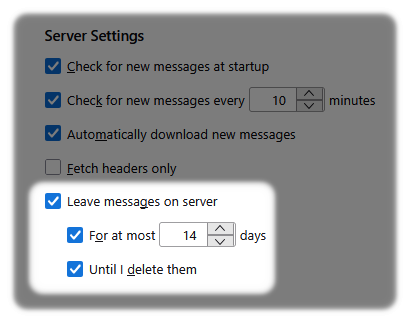
Ensure the following boxes are ticked:
- Leave messages on server
- Until I delete them
- For at most
- Ensure this setting has 14 days entered
Contacting Technical Support
Your email account should now be setup, if you have a problem we recommend repeating the setup steps above.
If you encounter issues with sending or receiving emails, or still need help with setting things up. Please reach out and contact our Technical Support team.