Setting up your Calix Router
CityFibre
1. Connecting your Calix Router
This guide is to assist in setting up your Calix router to connect to the internet. We show how to connect to an ONT, connect to the router, and install the CommandIQ app.
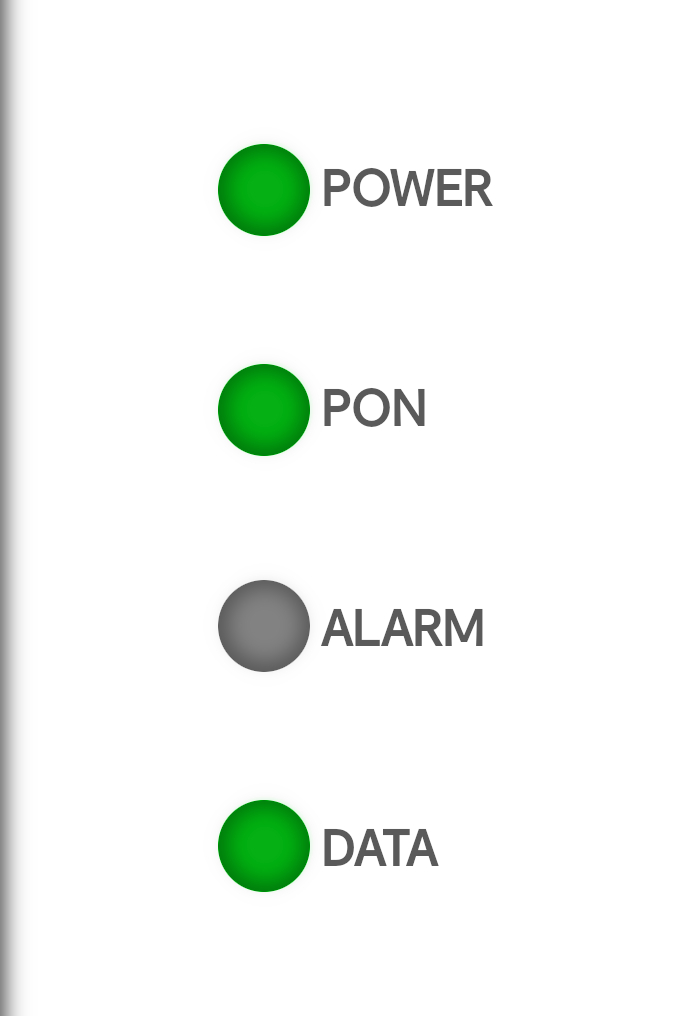
2. Identifying your ONT
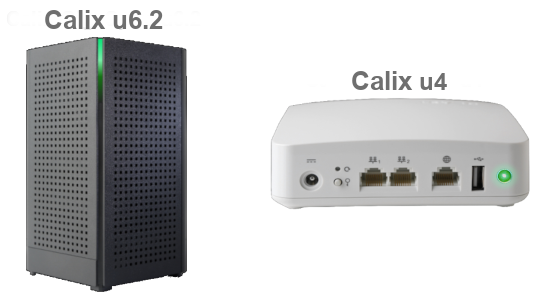
The ONT (Optical Network Terminal) could look different depending on when you had your service installed.
If you need help finding your ONT, look for a small black/grey or white box, mounted to a wall within your property (usually on the ground floor), with 4 lights.
3. Connecting to the ONT
- Plug the Ethernet cable into the "Ethernet" port on your ONT
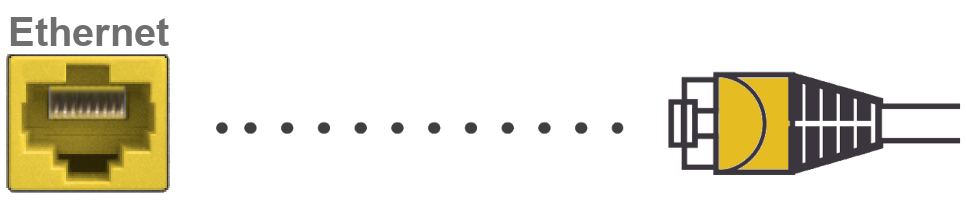
- Now connect the other end of the Ethernet cable to the "WAN" Port on your Calix router

4. Connecting the Power Cable
- Connect the UK style power cable into a mains power socket, then connect the remaining power cable in to the 2-PIN barrel power input at the back of your router

Now, the "Data" or "Ethernet" light will now begin to flash on your ONT. This indicates that your router is now talking to the Internet and setting up

4. Router light status
- The light on the router will start to flash Orange to indicate the booting sequence.
After a few minutes, the light on either router should turn Green, which indicates the router has connected to the internet and is ready to use.
Please note that if the light starts to flash Orange again, this indicates that a service/software is being upgraded. After approximately 3-4 minutes, the light should revert to a solid green
5. Connecting to the Router
When the light has gone solid green on either the Calix u6.2 or u4 router, the internet should be ready to use. To connect to the router, this can be done by a wired Ethernet connection or over Wi-Fi.
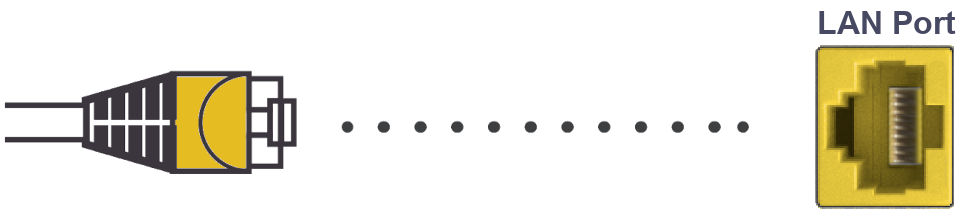
To connect via Ethernet:
- Use an Ethernet cable and plug one end in to one of the available LAN ports on the router
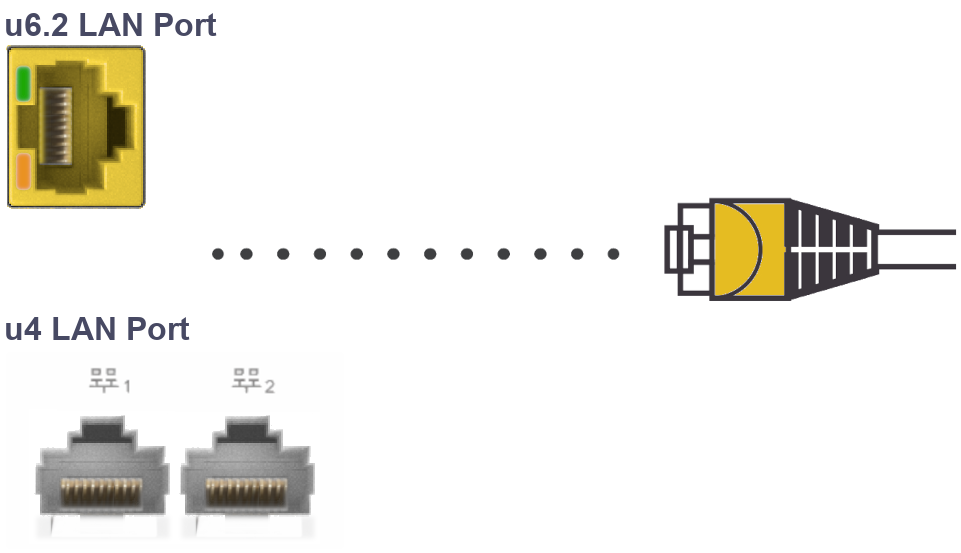
- Connect the other end of the Ethernet cable to your device
Once connected, the internet should be working. Test the internet and check that it is now working.
To connect Via WiFi
To connect to the Wi-Fi, look at the underside of the router for the data label.
- Look for the SSID name located on the Data label of your router

- Search for this name on the device you want to connect, then select it
The device you are using should then prompt you to enter the WPA Key password, which is also located on the Data label under 'Security Type'.

Once connected, test that the internet is working.
6. Register for the CommandIQ App
To set up the router using the CommandIQ app, the device you use must have a built-in camera. Download the app from the Apple App Store or Google Play Store. Search for ‘CommandIQ’, and install it.
When the CommandIQ app has finished downloading.
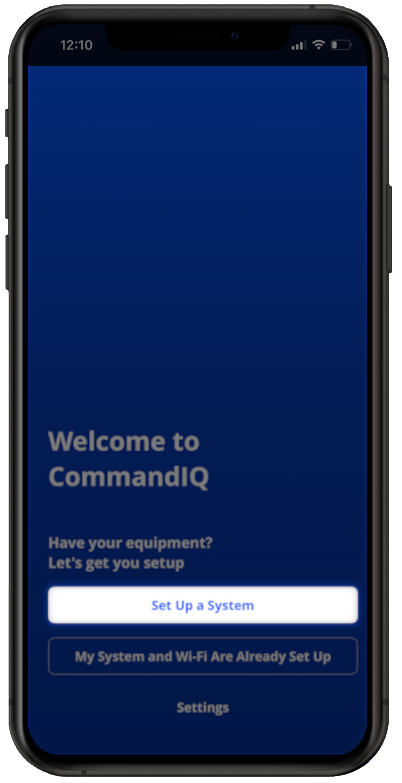
- Open the CommandIQ app

Once the App has been opened, it will present a 'Welcome to CommandIQ' screen, and it will ask if you would like ‘Notifications’. It is recommended that this be set to “Allow”. This can be changed within the notifications settings of your device at a later stage if required.
- Enter your Email Address
- Set location to All Other Countries
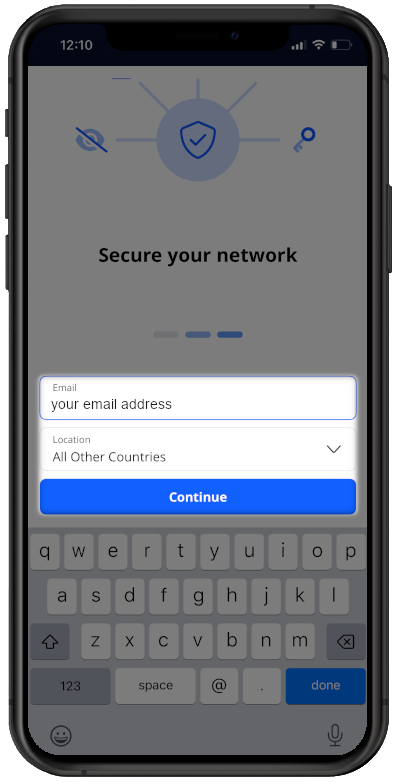
- Select Continue
The email address and location should already be entered from the previous screen.
- Set up a new Password for your account
- Enter your First Name and Last Name
- Check both boxes. Remember my login details for next time, and I agree to the Terms & Conditions and Privacy Policy
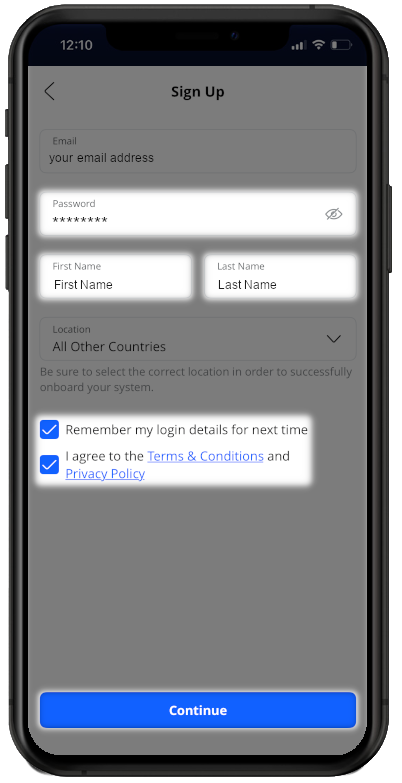
- Select Continue
6. Set Up a System
- Press "Set Up a System" then "Set Up a New System"
The app will open your camera, requesting to 'Scan a QR Code'. This is located on the underside of your Calix device in a central position on the Data Label.
Upon scanning the QR code, the App will add the device and show the following information:
- Model
- MAC Address
- Serial Number
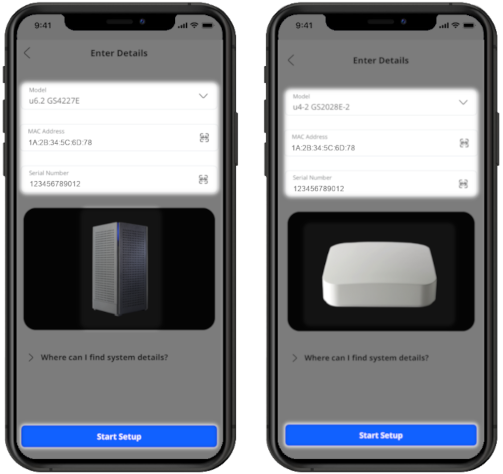
Select Start Setup
- The setup steps shown in these pages have already been completed, Swipe left on each to continue
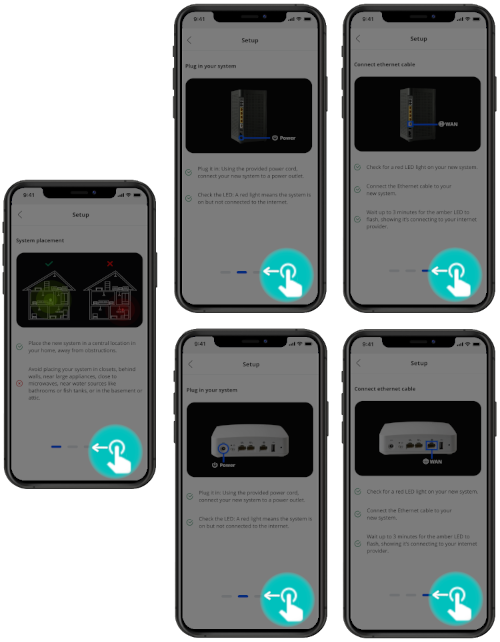
- Check that the LED is Green and if so select Continue, LED is Green

Once selected, check that the internet is working and follow the above steps to connect other devices to this network.
Contacting Technical Support
If you need further assistance, please contact our Technical Support team.