Setting up Zen Mail on iPhone or iPad
Before you Start
To setup Zen Mail, you'll need your email account and server information.
If you don't have this you can log into My Account or follow the step-by-step guide here to find it.
1. Finding Mail Accounts
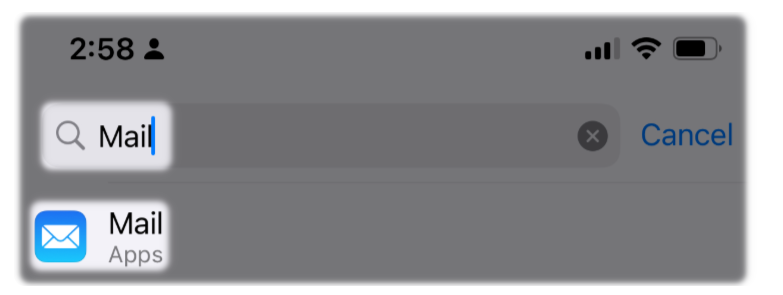
Unlock your iPhone and open the "Settings" App. You can also use search to locate this
![]()
- Locate the search bar at the top and type "Mail", then select the Mail App from the results
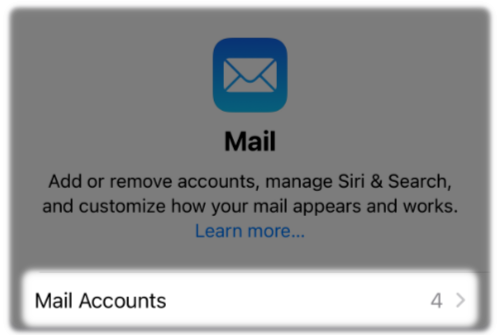
- This will open the Mail App on your device. Within this select "Mail Accounts"
2. Adding a New Mail Account
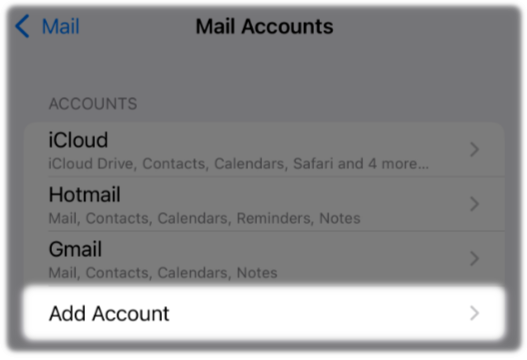
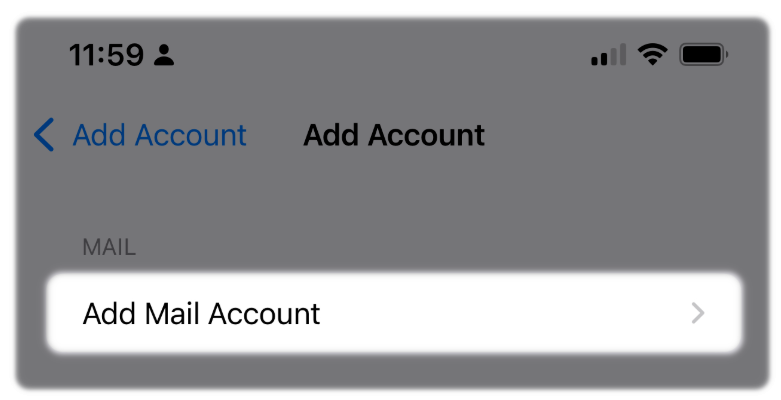
- To add a new mail account. From the Mail Accounts screen, select "Add Account"
- This will list the different account types, select "Other"
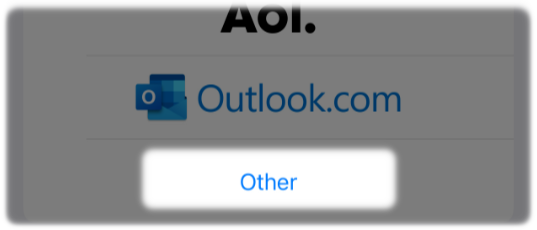
- Now select "Add Mail Account"
3. Entering Account Information
The next screen will ask for some of your Zen account information:
Name - enter the name you wish to be presented on your emails
- Email - enter your email alias, if you don't have an alias, enter your email username
- Password - Type in the password for the email address
For help on finding your Zen Mail Username and Password, you can read this guide here.
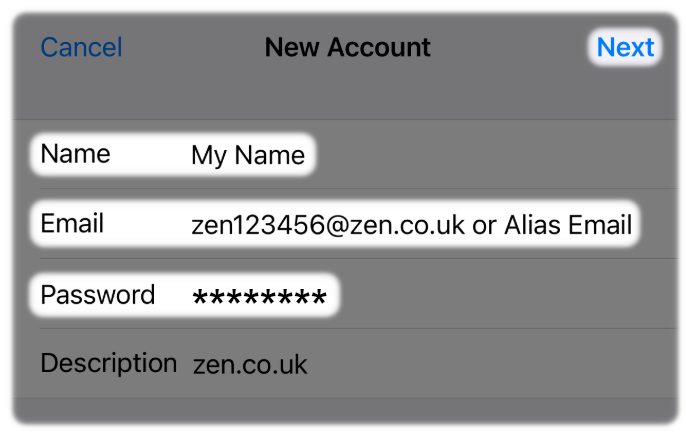
- Now select "Next", located in the top right
- From the options, select POP (or POP3) as the account type
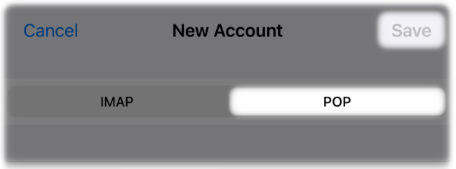
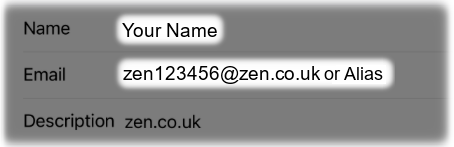
- Your Name, Email and Description will be auto-filled from the previous step
4. Entering Server Settings
Now, enter the following Zen Server settings:
- Host Name - Type mailhost.zen.co.uk in both fields
- Username - Type your Zen Mail Username in both fields
- Password - Type your Zen Mail Password in both fields
For help on finding your Zen Mail Username and Password you can read this guide here.
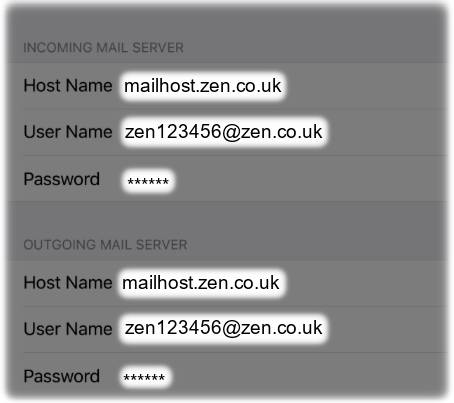
Note: During setup Outgoing Mail Server settings are labelled as "Optional". For Zen email to work these must be entered. Enter the same settings as you have for Incoming Mail Server.
We recommend reviewing these settings, being sure there's no typos or errors before continuing.
- Select "Save" to proceed
5. Checking Port and Encryption Settings
On the Mail Accounts screen, We’ll need to verify and check the port settings, as well as ensure the correct encryption method is selected.
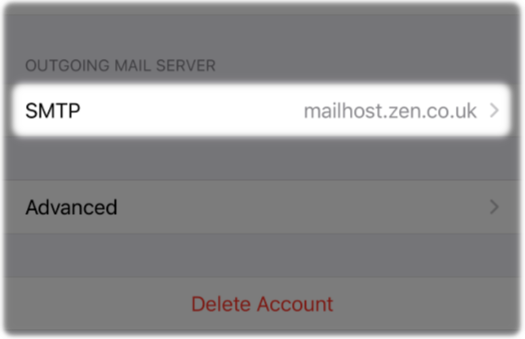
Select the zen.co.uk account that has just been created

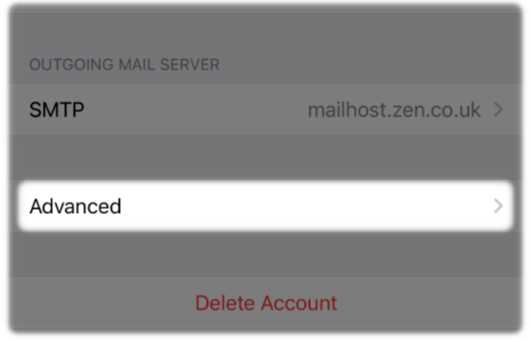
Select "mailhost.zen.co.uk" under the Outgoing Mail Server heading
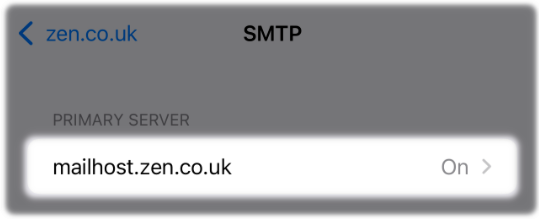
- Select the primary server, which should be mailhost.zen.co.uk, and ensure this is set to "On"
Check "Use SSL" is enabled, and set the "Server Port" to "587"
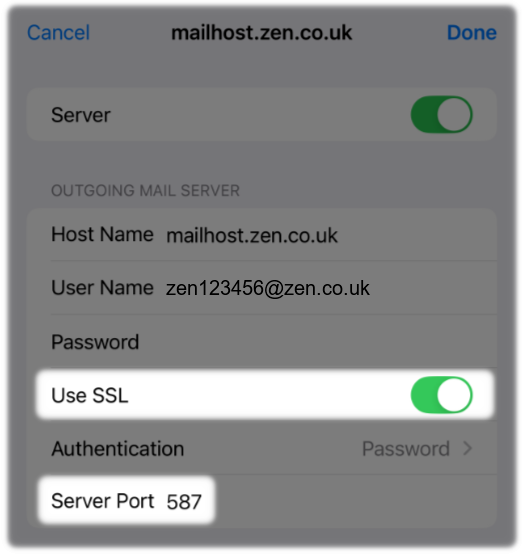
- Now select "Done" at the top right corner to confirm the changes
- Now select "zen.co.uk" at the top left corner, taking you back to the account information page and select "Advanced"
Check "Use SSL" is enabled, and set the "Server Port" to "995"
Set "Delete from server" to "seven days"
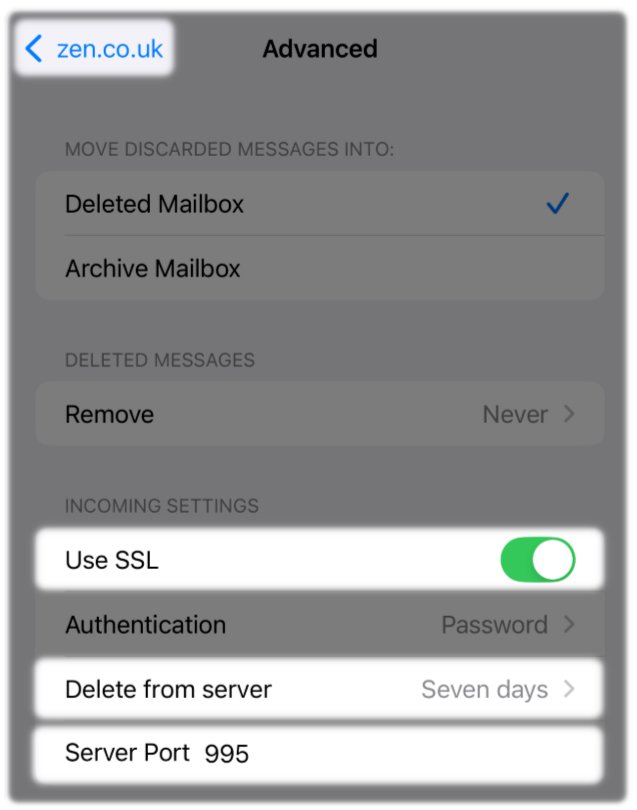
Once this is set, click on 'zen.co.uk' at the top left to return to the main menu, then select "Done" in the top right to complete your setup.
Contacting Technical Support
Your email account should now be setup, if you have a problem we recommend repeating the setup steps above.
If you encounter issues with sending or receiving emails, or still need help with setting things up. Please reach out and contact our Technical Support team.