Eero ISP Settings
CityFibre
1. Entering ISP Settings during initial Setup
When setting up your Eero for the first time, if you encountered an error stating "your Eero can't reach the internet", you'll need to manually setup using Zen's ISP settings.
- From the error screen, select the "Internet Settings" option

- Now select "WAN Type"
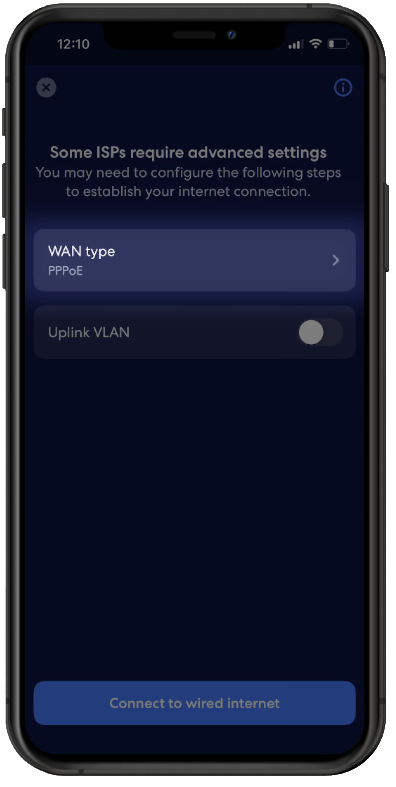
- Select "PPPoE" and enter your Zen Username and Password for the service you have with us. You'll find this information within your Customer Portal here, then press "Save Settings"

- Enable "Uplink VLAN" then type 911
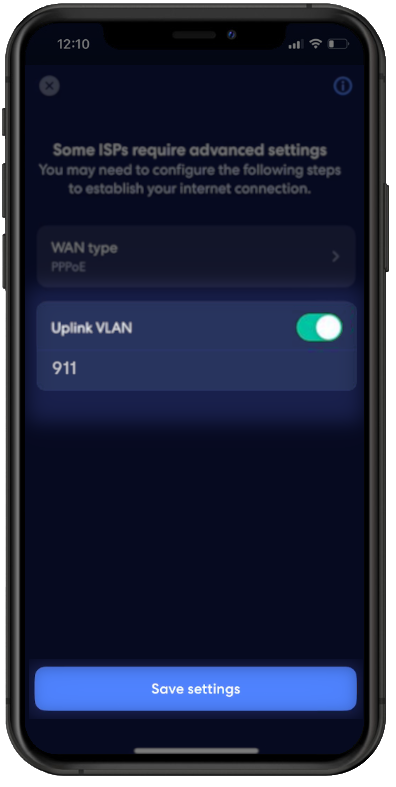
- Press "Save settings"
- Now select "Connect to wired internet" then complete the setup step 6 within this guide here

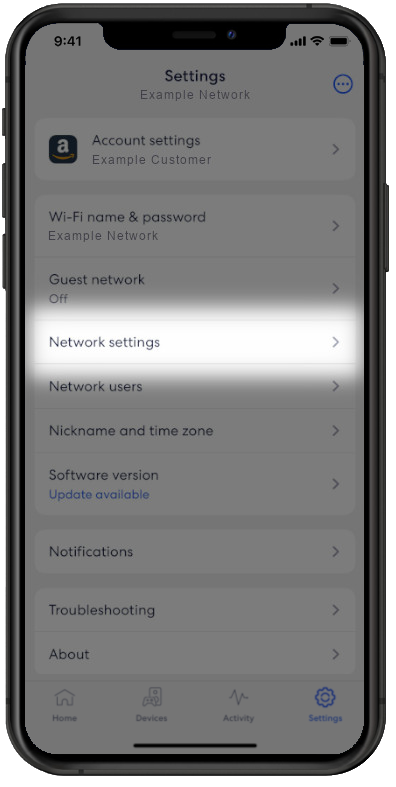
2. Entering ISP Settings After Setup
If you need to change your ISP Settings at any time after setup, you can follow these steps:
- Open the Eero App and select "Settings"
- Then select the option for "Network Settings"
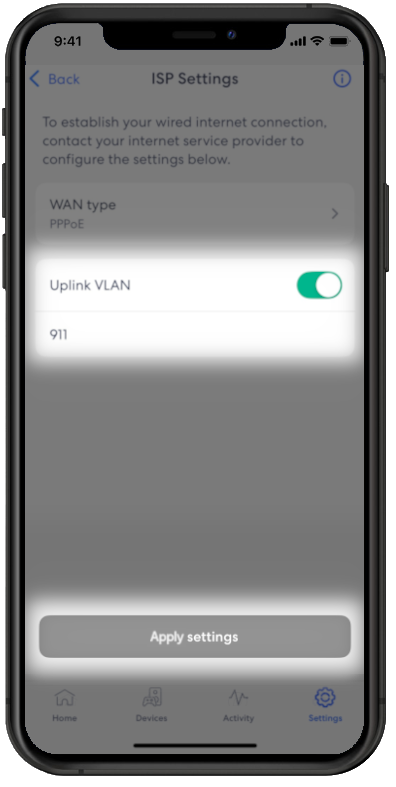
- Now select "ISP Settings"
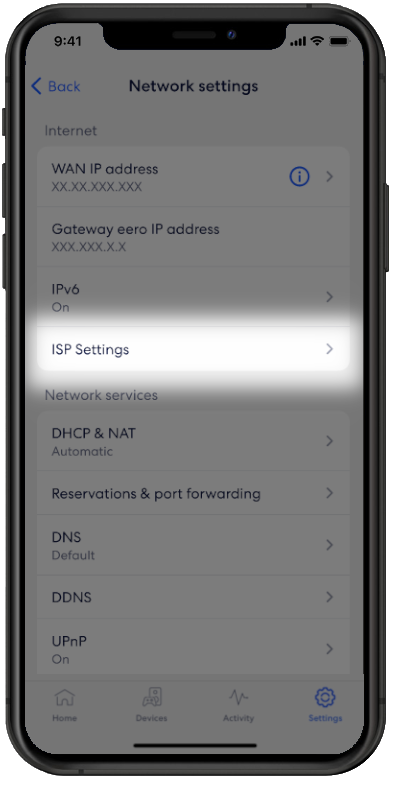
- Press "WAN Type"

- Select "PPPoE" and enter your Zen username and password. You can find this information within your Customer Portal here
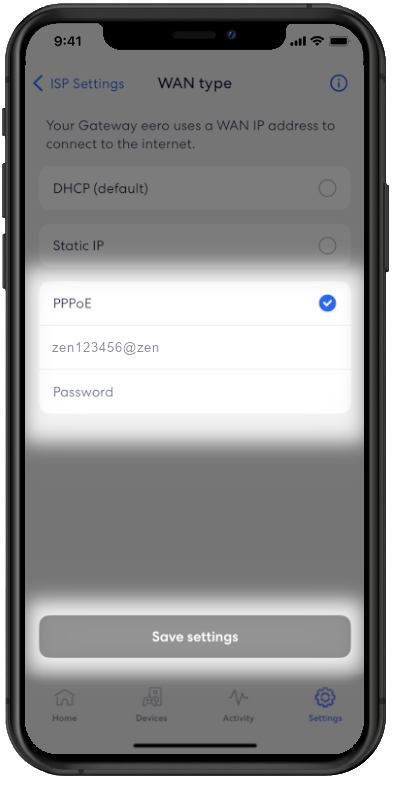
- Enable "Uplink VLAN" then type 911, Then select "Apply Settings" to complete setup