
 Sign in to MyAccount
Compute on CloudFlex
Compute on CloudFlex
The Compute section covers the creation and management of virtual servers within CloudFlex. Servers provide the processing power, memory, storage, and network connectivity needed to run your applications and services.
The topics below guide you through deploying servers, configuring access and security, customising builds, managing storage, resizing resources, and protecting your data with backup and recovery options.
Compute in CloudFlex
Create a Server
Servers are virtual machines created within your project with associated CPU, RAM, Storage and network.
- Select Servers > Create a Cloud Server
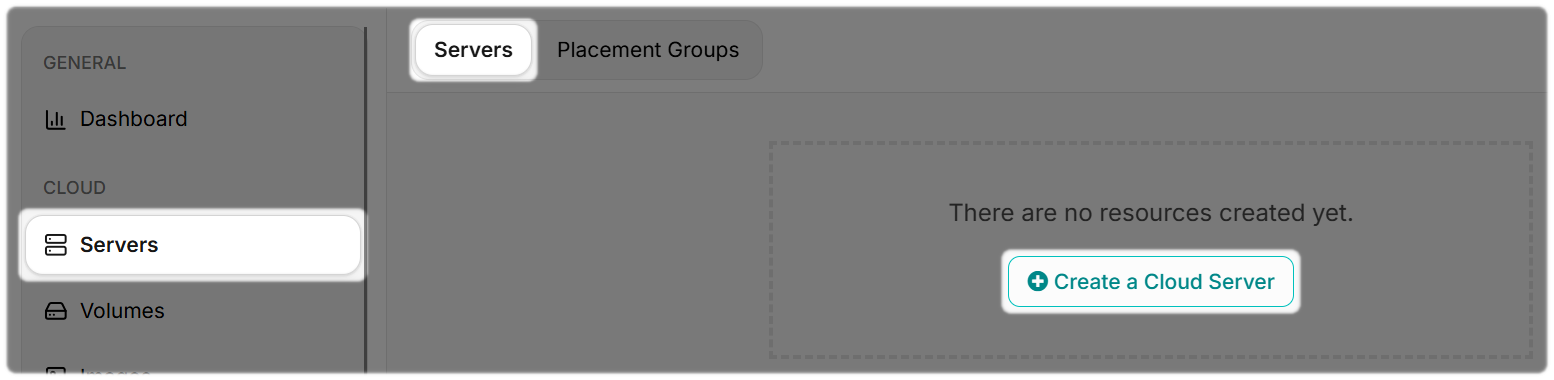
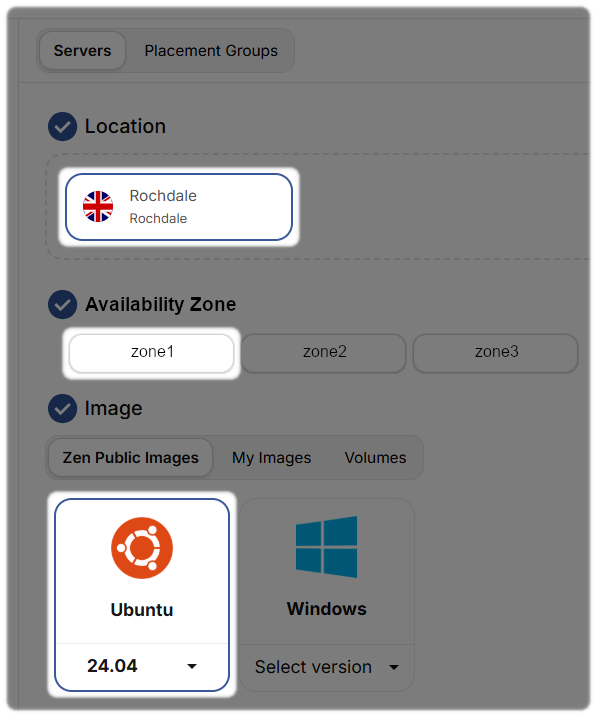
Fill out the appropriate fields. e.g.
- Location e.g. Rochdale
- Availability e.g. Zone: 1
- Image e.g. Ubuntu 24.04
- Hardware, Select your desired flavour e.g. 1CPU, cpu1-ram2-disk16
- Volumes, Create / Select additional volumes if required .......................
- Networking, Select the network for the Server
- NOTE: Do NOT disable port security, Disabling this will prevent Floating IP’s and Security Groups from working
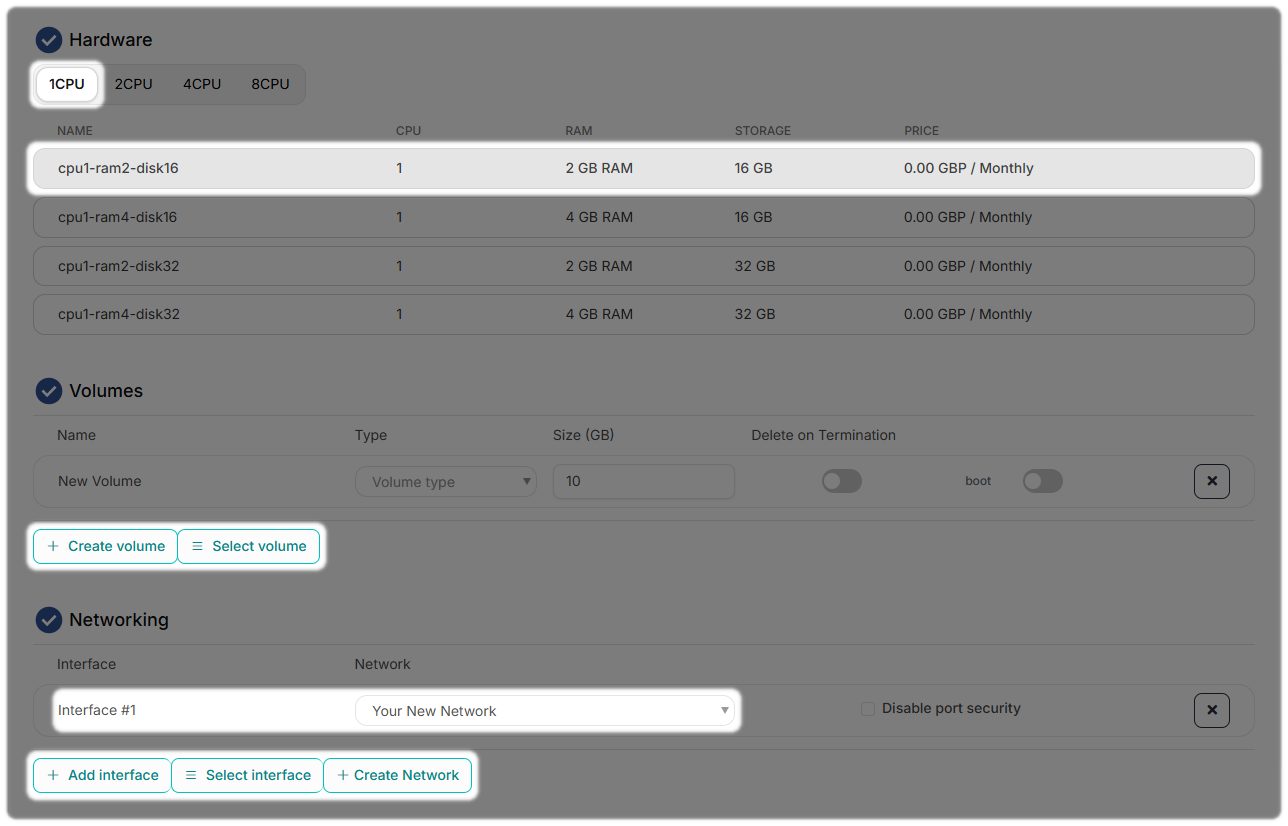
Note: if you have not already created a network, you have the option to create one here if required.
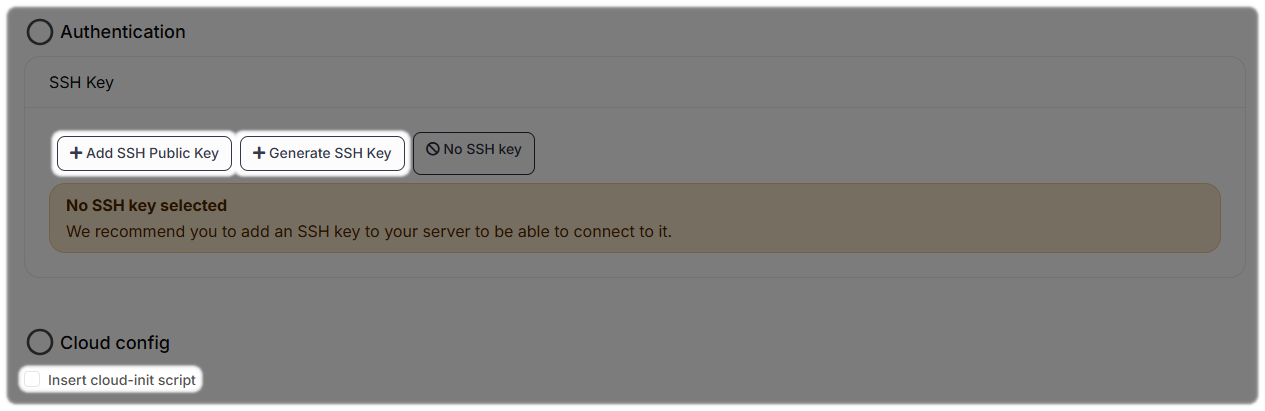
- Authentication, Add an existing or Generate an SSH Key
- We recommend you to add an SSH key to your server to be able to connect to it, if you generate this here remember to save it and keep this safe.
- Cloud Config, If you have a cloud-init script, check the box enter this here, if not then leave the box unchecked
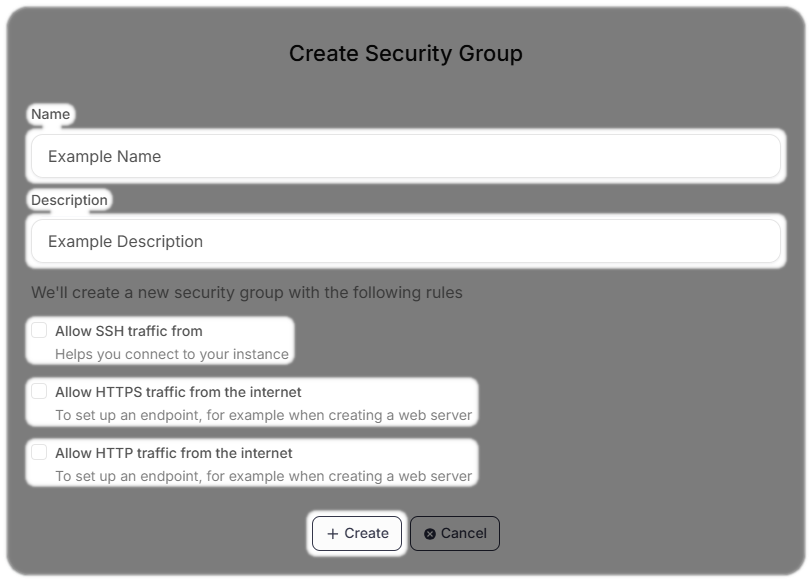
- Security Groups, Select or Create an appropriate security group to allow access
- Allow SSH traffic from - Helps you connect to your instance
- Allow HTTPS traffic from the internet - To set up an endpoint, for example when creating a web server
- Allow HTTP traffic from the internet - To set up an endpoint, for example when creating a web server
- Anywhere (0.0.0.0/0)
- My IP e.g. 222.333.44.5
- Custom - enter the desired custom IP address
Once the information is entered select, Create
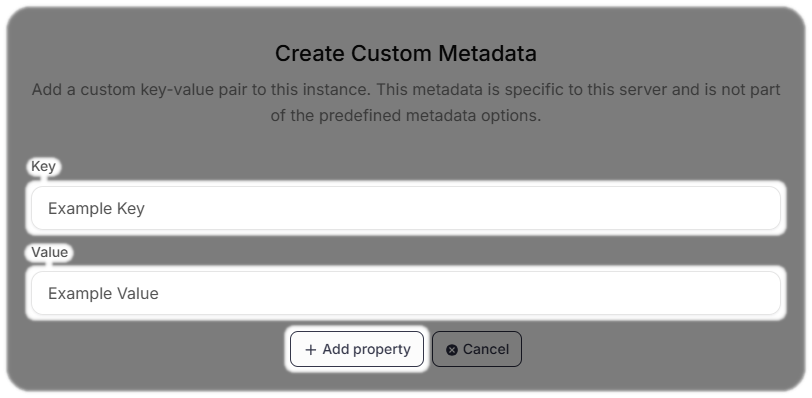
- Add any required Metadata if applicable by selecting Add property

If you create a Custom Metadata here, enter the Key and Value
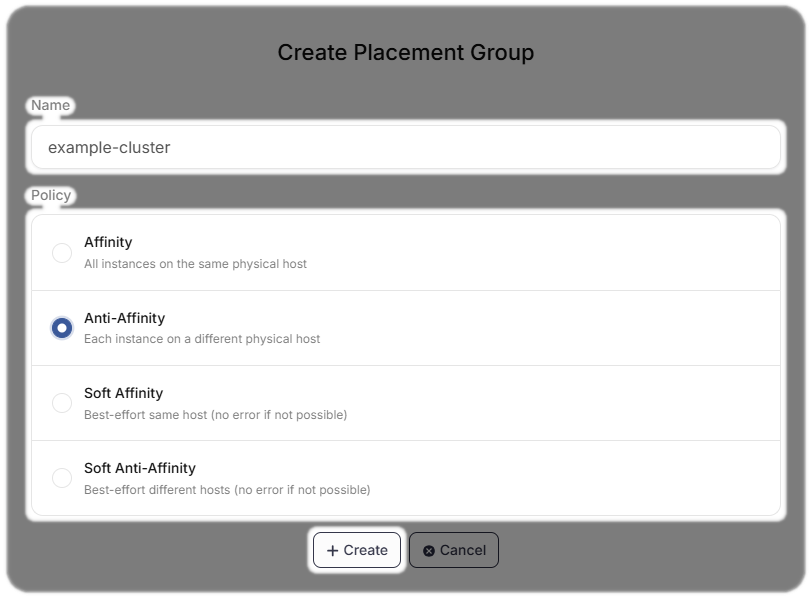
- Add a Placement Group, Create or select a placement group

If you create a placement group here, enter the name then select one of the following options:
- Affinity - All instances on the same physical host
- Anti-Affinity - Each instance on a different physical host
- Soft Affinity - Best-effort same host (no error if not possible)
- Soft Anti-Affinity - Best-effort same host (no error if not possible)
Once the information is entered select, Create
- Give your Server a name located at the bottom of the page

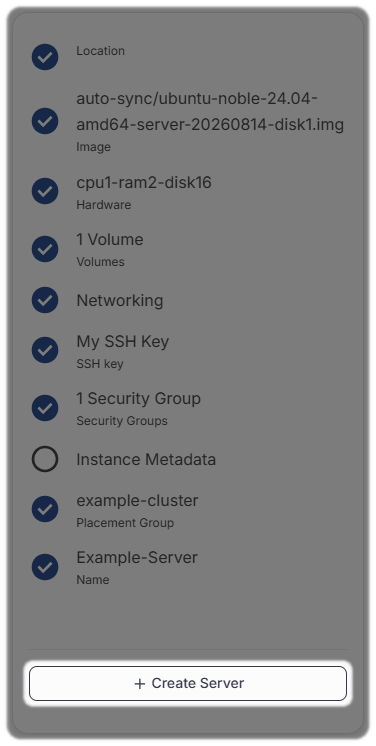
Once you have entered all the relevant information you you may have noticed the Checklist located to the right hand side, once you are happy select, Create Server.
Note: If you have created a Windows Server, you will have the added option within the Server Actions section to Retrieve Password.
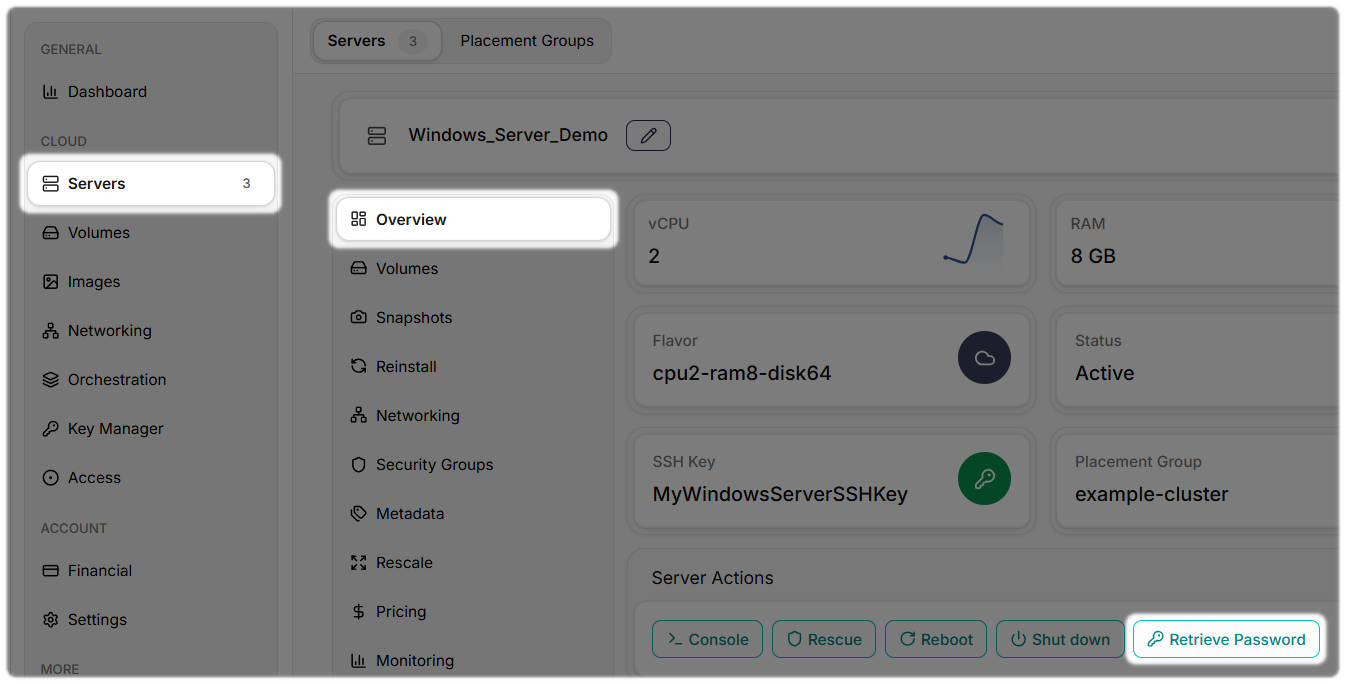
Selecting the Retrieve Password will provide two options:
Option 1: Upload file
- Selecting this option you will use Windows Explorer to browse to where the SSH key file is stored, select the file
- Select Decrypt Password, you password will reveal itself in the green above box, selecting the paste key option here will reveal the full SSH key if required
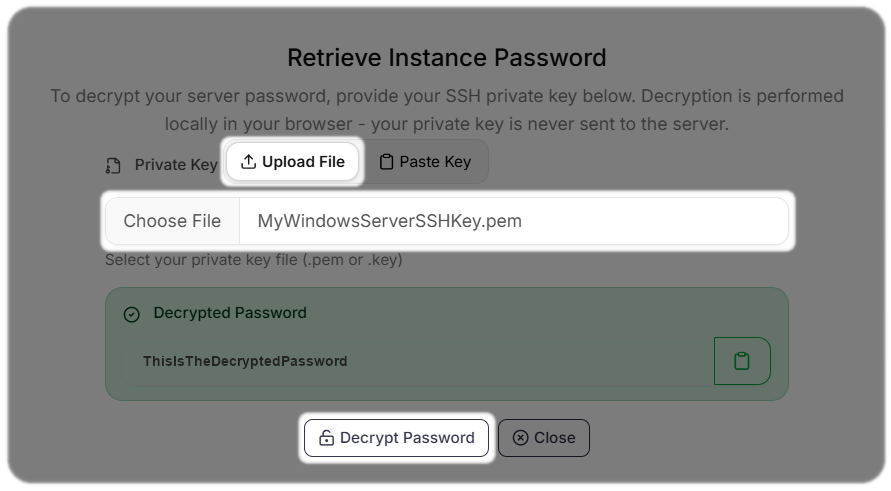
- Option 2: Paste Key
- Selecting this option you can Paste the whole SSH key in to the box provided from the file that you have saved
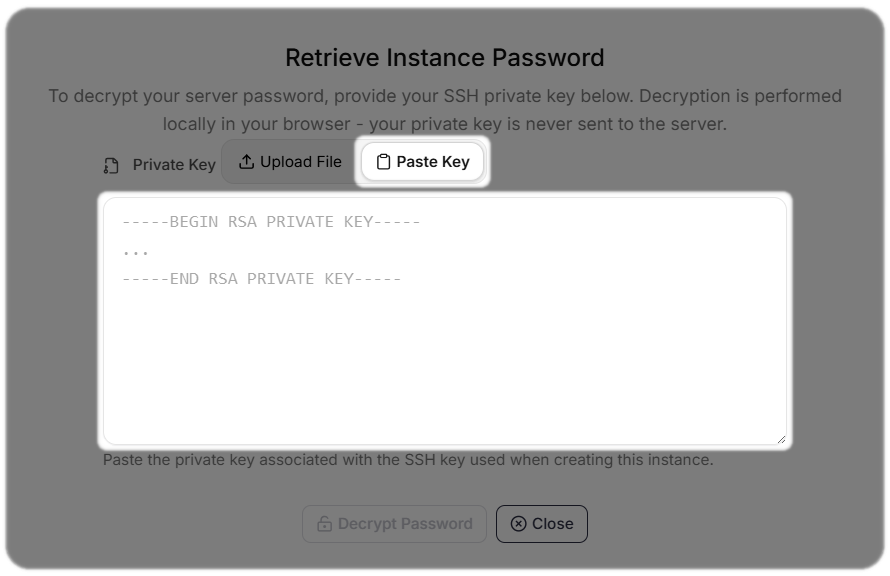
If you have been directed here from section 4.2 Floating IPs, select to Networking in CloudFlex be redirected back to the page.
Need Help?
Feel free to email cloud@zen.co.uk.