
 Sign in to MyAccount
Networking in CloudFlex
Networking in CloudFlex
Networking provides the foundation for communication within your CloudFlex environment, enabling your servers, applications, and services to connect securely with each other and external networks. Using CloudFlex networking features, you can create private networks and subnets and configure routers.
This section explains how to configure and manage the networking components available within your project, helping you build secure, reliable, and scalable network infrastructure for your workloads.
Networking in CloudFlex
Create a Network
To Create a network, first, login to your account and create or locate an existing project, a guide for this can be found here. see - Getting Started with CloudFlex if required.
Once you have selected your project from within the portal,
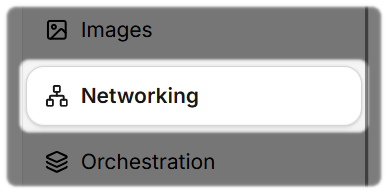
- Select Networking from the left hand menu
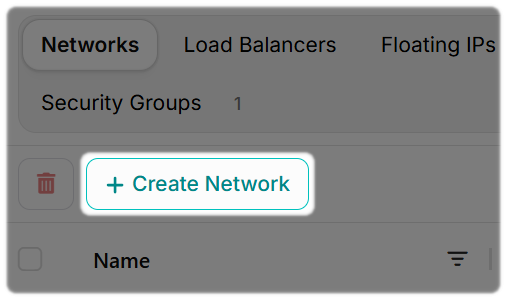
- Check that the Networks tab is selected on the top Tool Bar

- Select Create Network
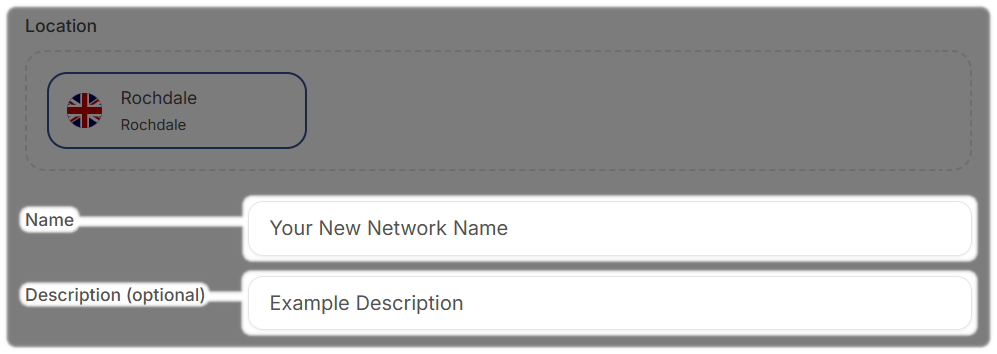
You will be presented with a Create network page, Enter the details of the network that you want to create.
- Name
- Description
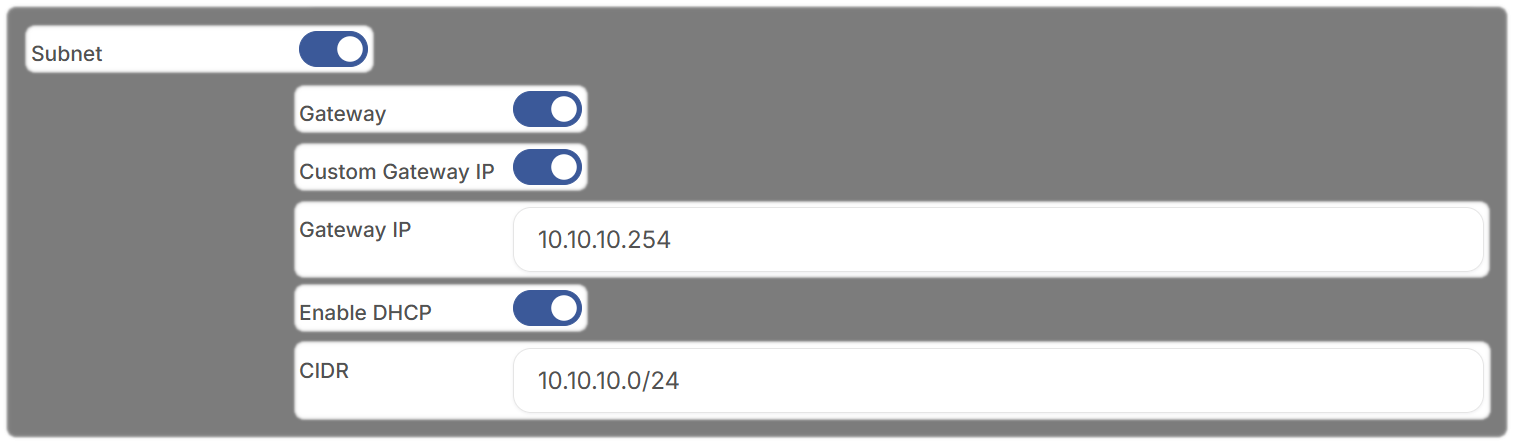
- Enable Subnet
- Enable Gateway
- Enable Custom Gateway IP
- Enter your desired gateway IP e.g. 10.10.10.254
- Enable DHCP
- Enter your desired network CIDR with / notaton e.g. 10.10.10.0/24
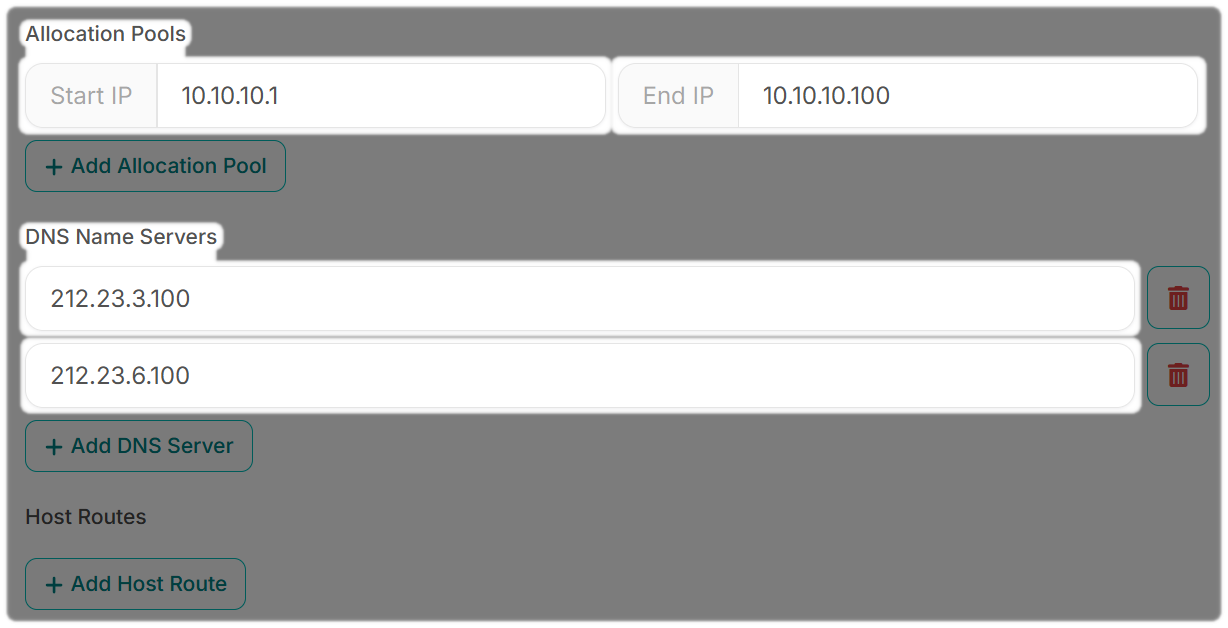
Set your IP Allocation Pools
- Start IP: e.g. 10.10.10.1
- End IP: e.g. 10.10.10.100
- Add DNS Servers e.g.
- 212.23.3.100
- 212.23.6.100
Note: Select + Add DNS Server to add multiple DNS
- Select Create Network at the bottom of the page
Your new network should now be created e.g.
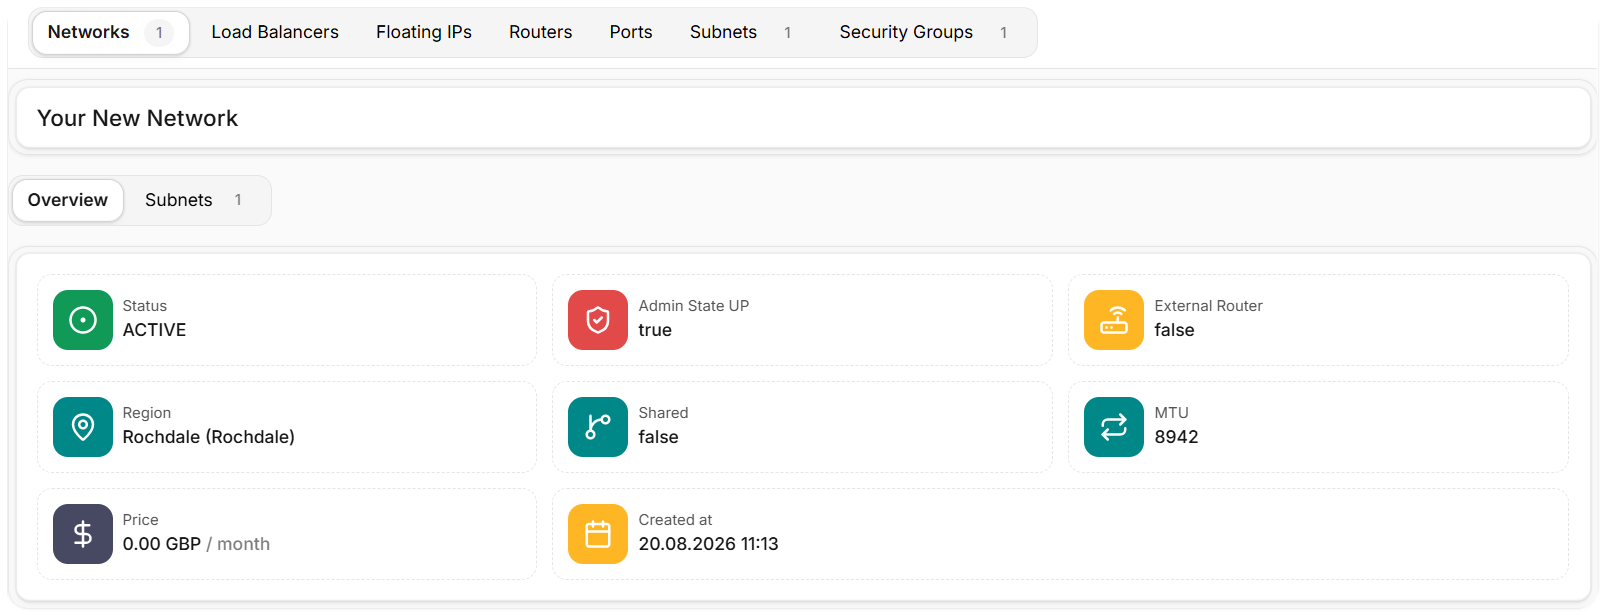
Subnets are attached to Networks to specify the IP range for the network. Completing the above steps will have created a subnet with your CIDR/Gateway IP.
You can confirm this by selecting the Subnet option from the top tool bar on your newly created network:

- Select the Subnet Name

This will open the Subnet details for this network, you can update the subnet details if required by selecting the Update Subnet option located at the top right hand corner.
If you need additional Subnets.
NOTE: you will need a network for this to be attached
Go to Networking > Subnets > Create subnet
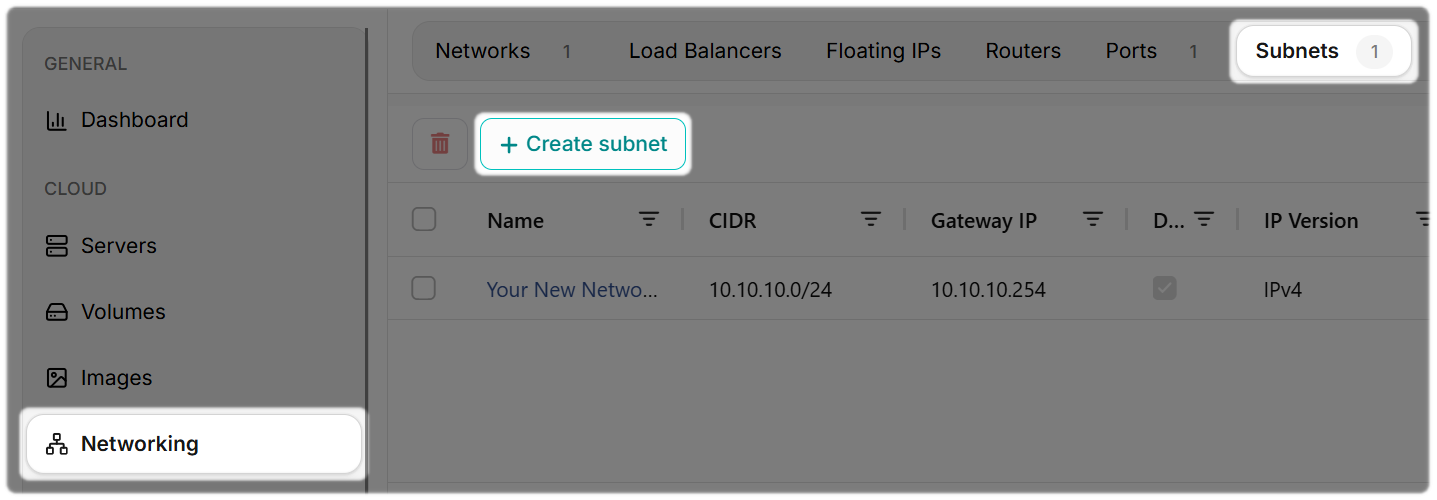
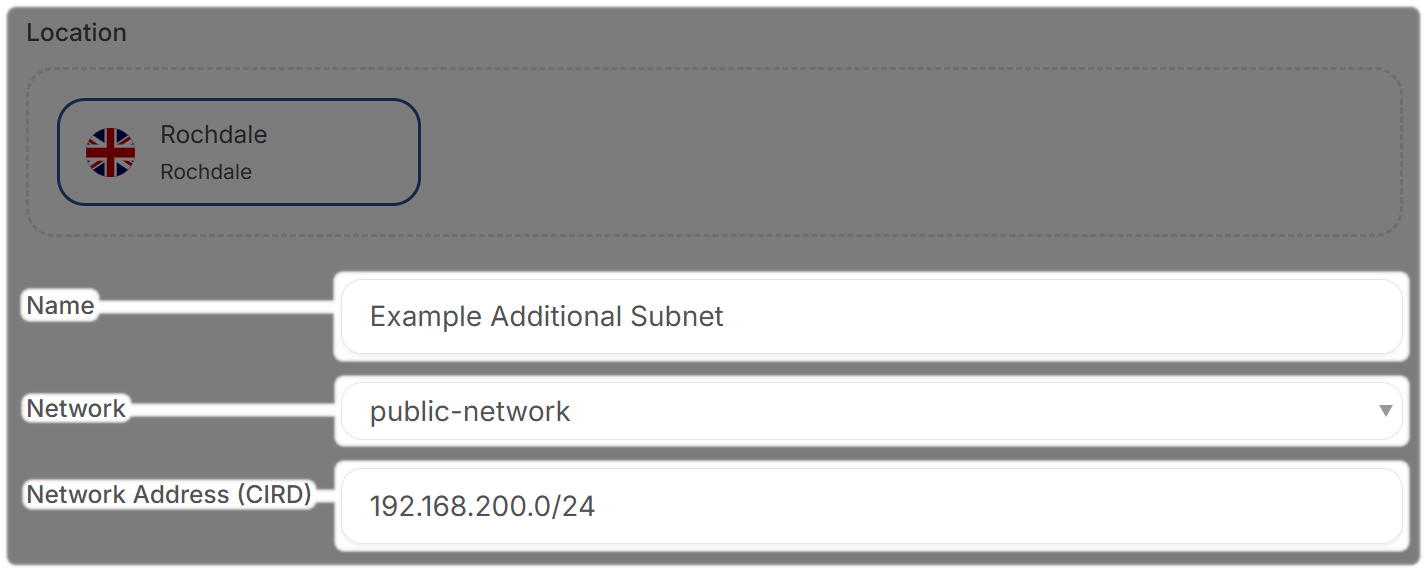
Enter the details of the new subnet you want to create.
- Name
- Network e.g. public-network
- Network Address with / notation e.g. 192.168.200.0/24
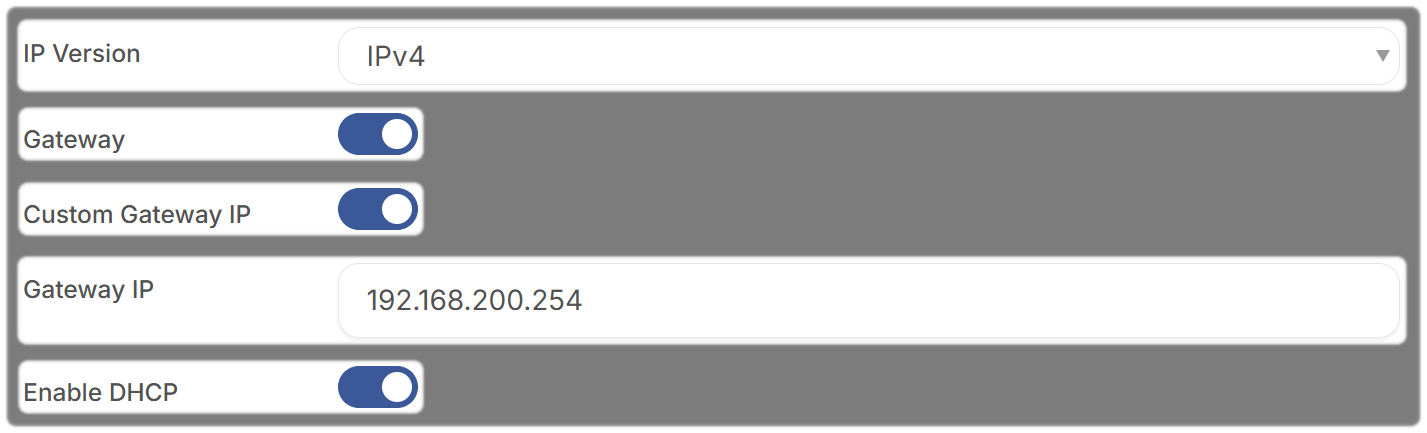
- IP Version IPV4
- Gateway Enabled
- Custom Gateway IP Enabled
- Gateway IP e.g. 192.168.200.254
- Enable DHCP Enabled
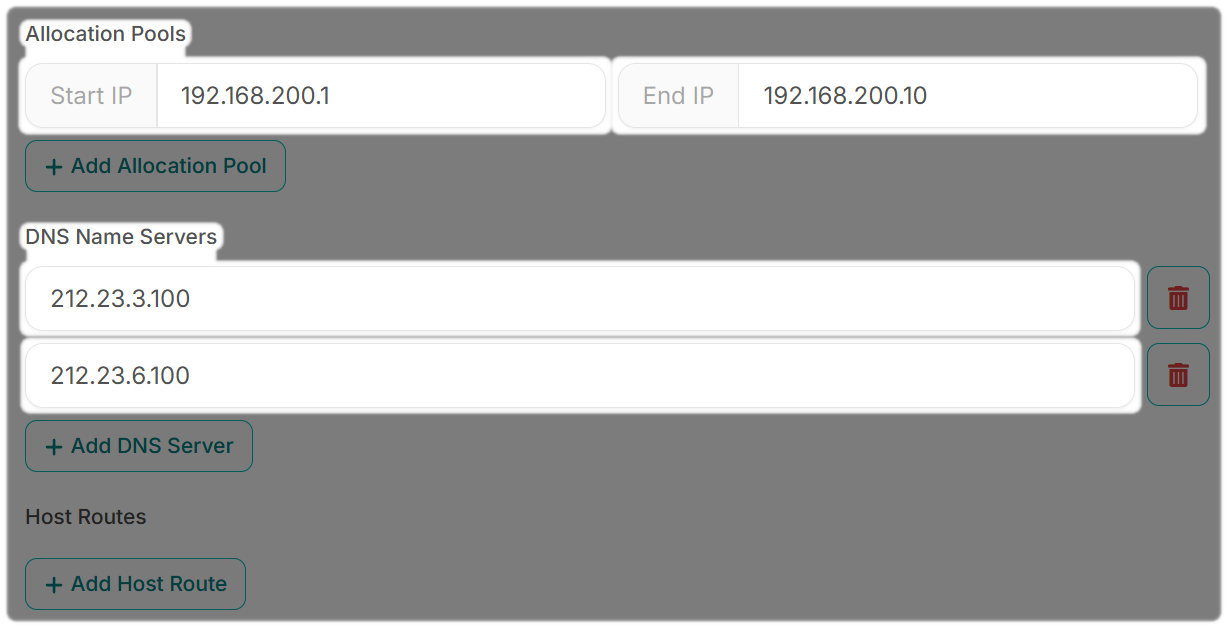
Set your IP Allocation Pools
- Start IP: e.g. 192.168.200.1
- End IP: e.g. 192.168.200.10
- Add DNS Servers e.g.
- 212.23.3.100
- 212.23.6.100
Then select Create Subnet located at the bottom of this page
Your additional Subnet should now be created.
Routers are used to allow connectivity into your environment, A router will be allocated a Public IP.
That public IP will be used by servers on your network for access to the internet unless you assign a Floating IP, in that instance your server will use the Floating IP.
NOTE: security groups are required to allow connectivity.
3.1: Creating a Router
Select: Networking > Routers > Create Router
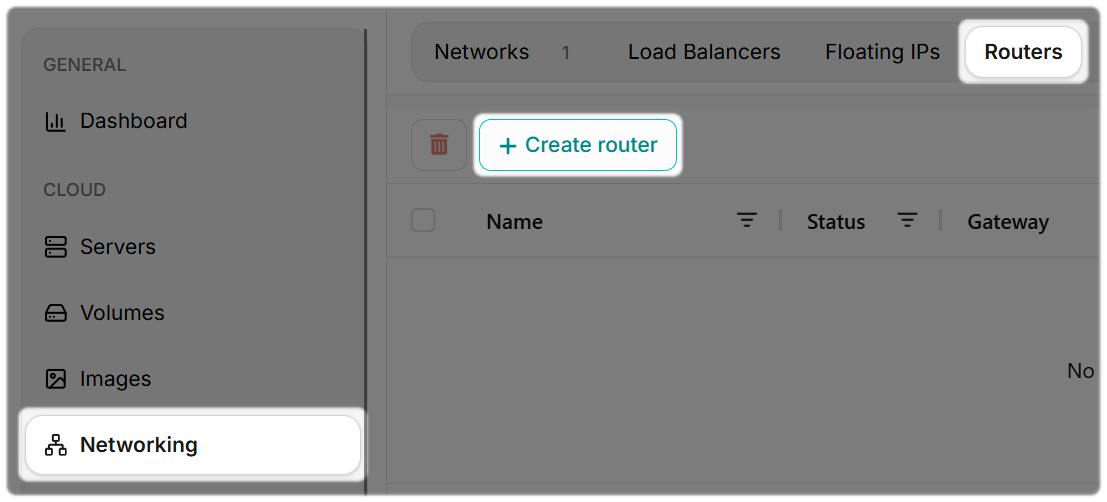
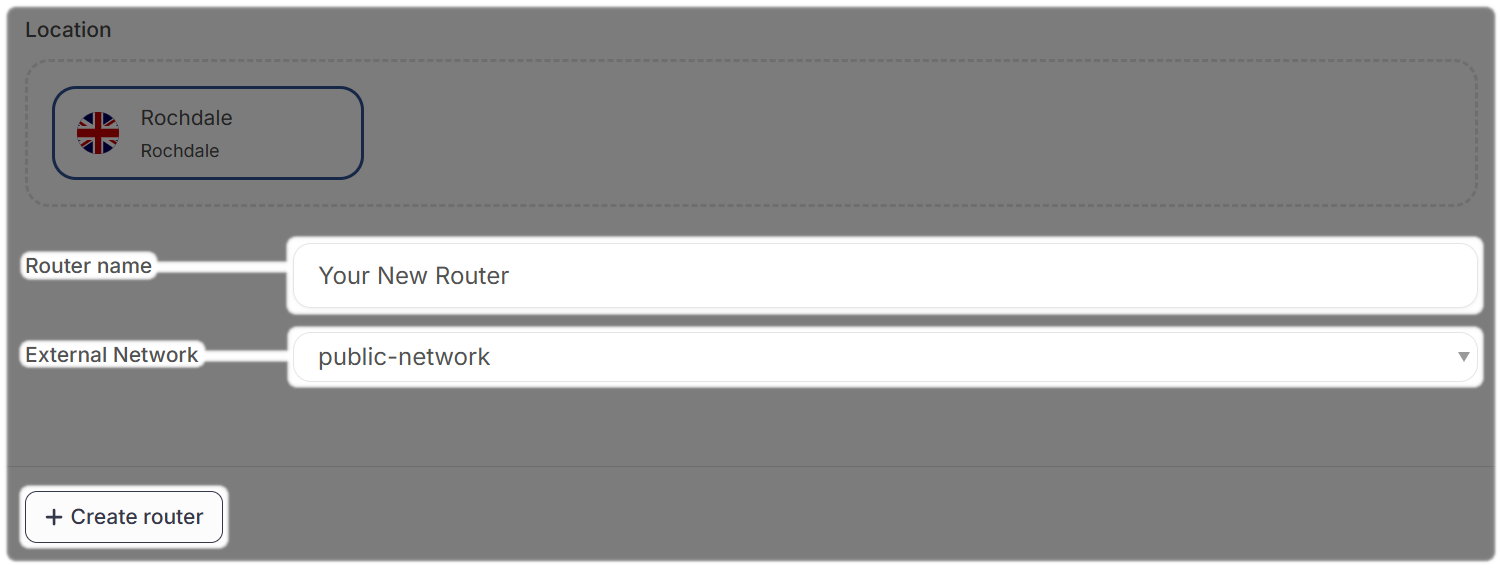
- Enter a name >
- Select an external network e.g. public-network
- Select Create Router
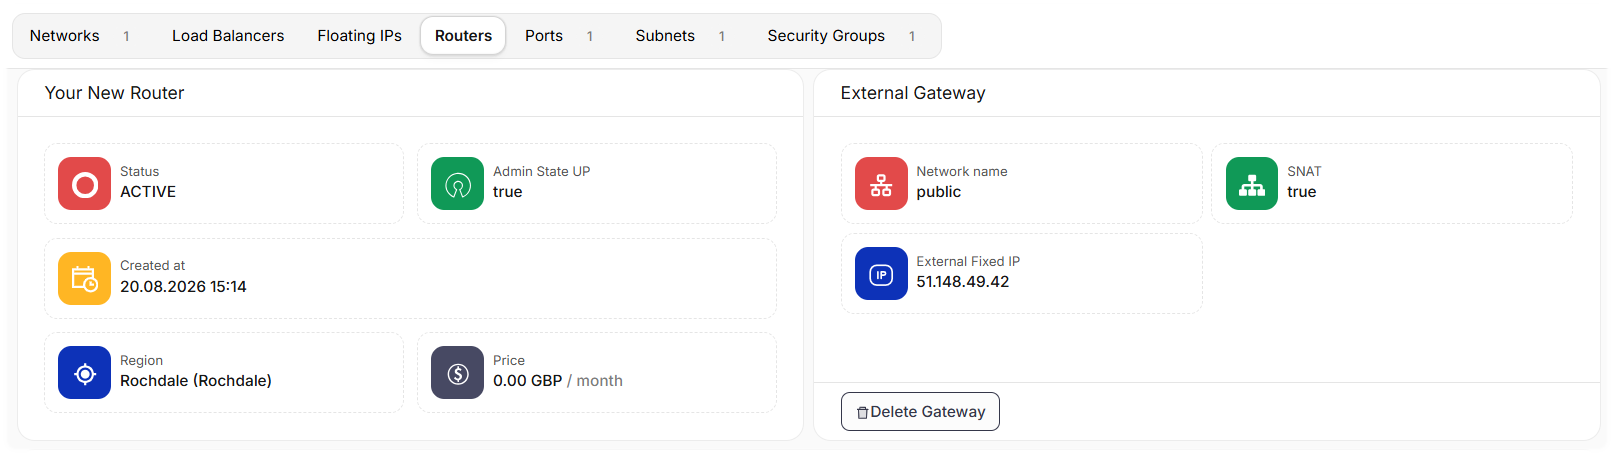
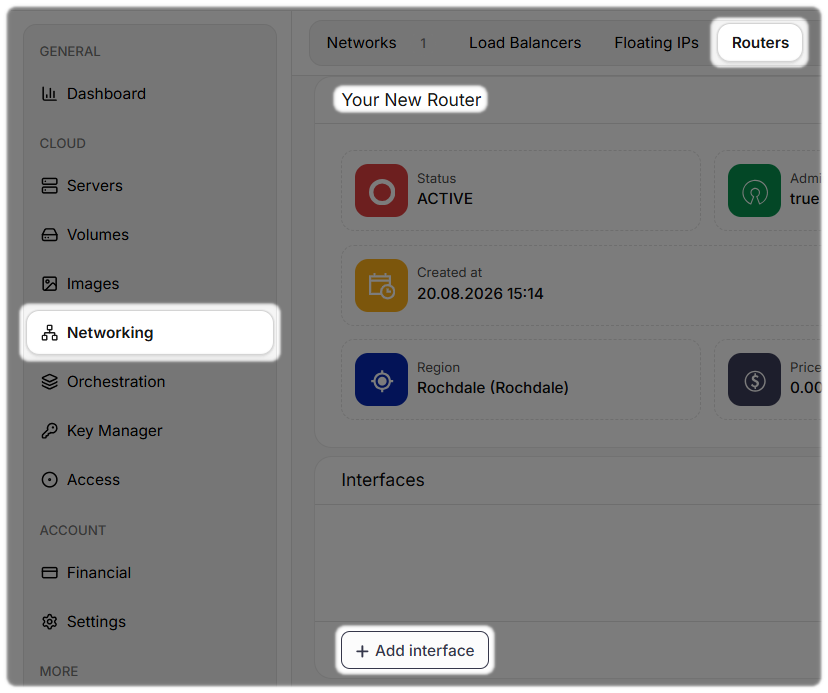
Once the Router is created it will open a router page,
3.2: Adding an Interface
You will need to connect it to your Network by adding a Interface located on this screen.
If you need to locate this page to add the interface from the left side menu,
- Select Networking > Routers > Router Name > Add Interface
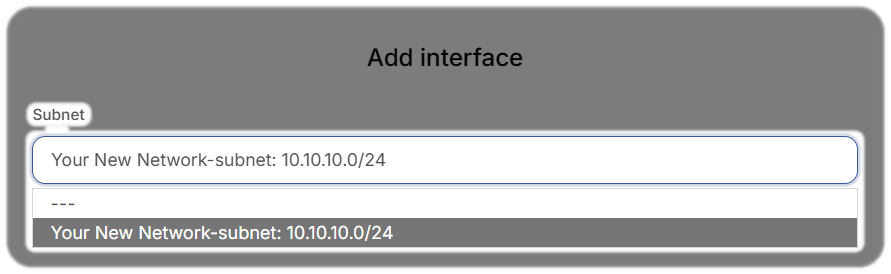
- Select the Subnet from the drop down menu you want to use
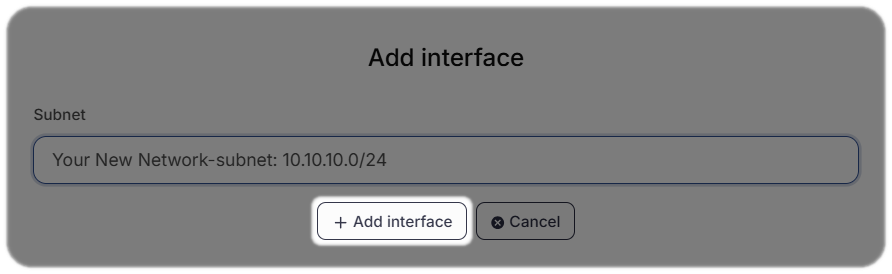
- Select Add Interface
- Confirm this is attached in Networking > Routers > Router Name

Floating IPs
Floating IP’s are used to allow inbound connectivity to a server and are combined with Security Groups to allow connectivity.
4.1: Create a floating IP
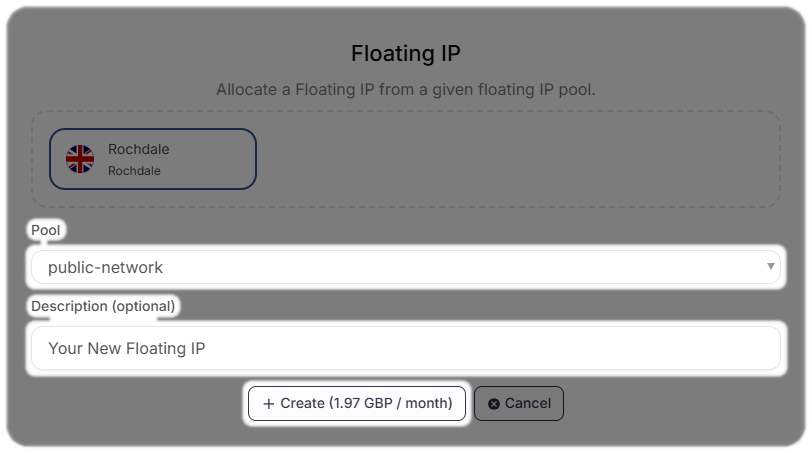
- Select Networking > Floating IPs > Create Floating IP
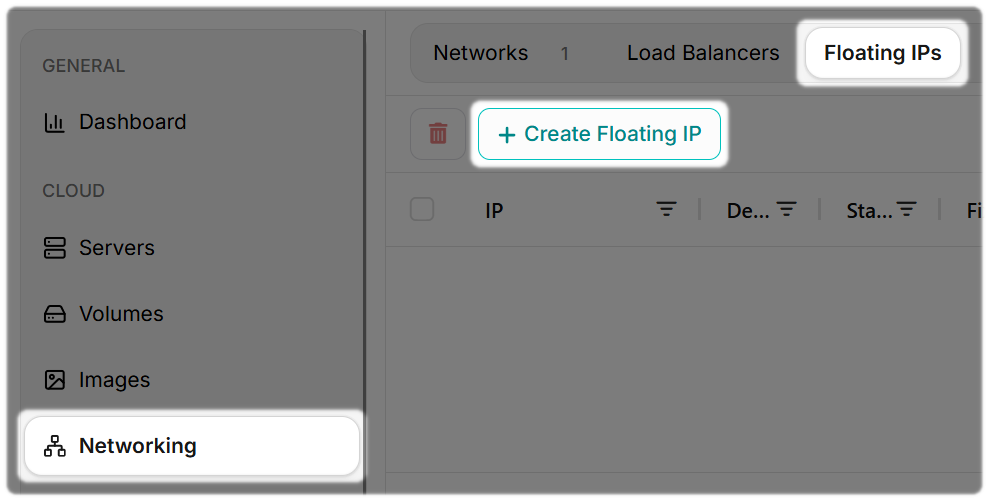
- Select the Pool you wish to obtain a Public IP from e.g. public-network
- Enter a description and select Create
- note that the price per month is shown also
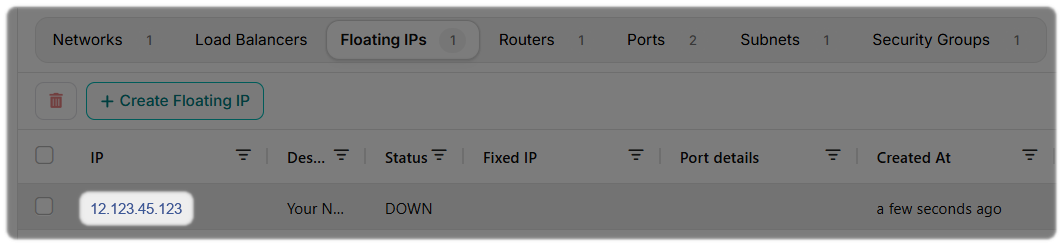
Your floating IP should appear once created
4.2: Assign a floating IP
To assign a floating IP, a server needs to be created. See section - 1. Create a Server
If you have already created your server,
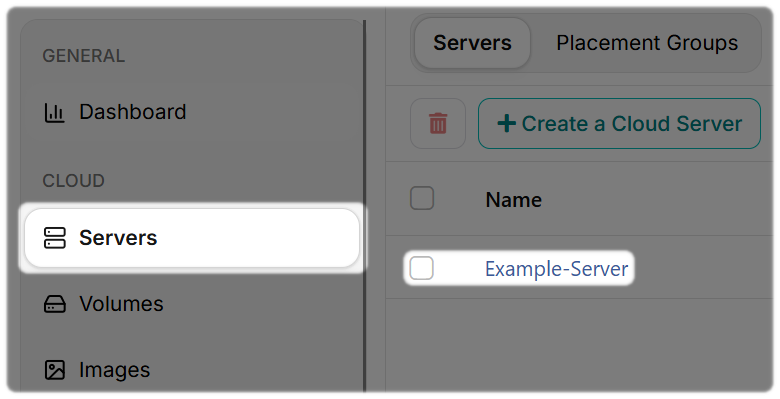
- Select Servers > Server name
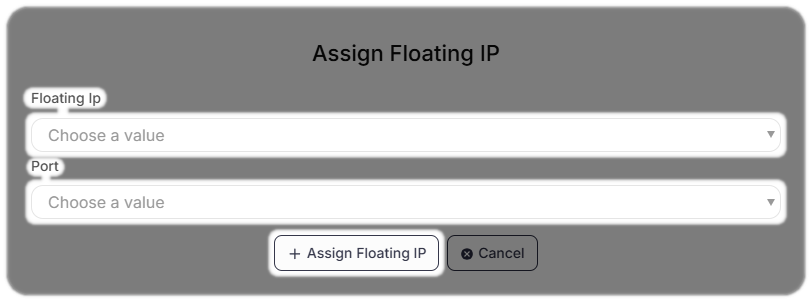
- Select Networking > Assign floating IP
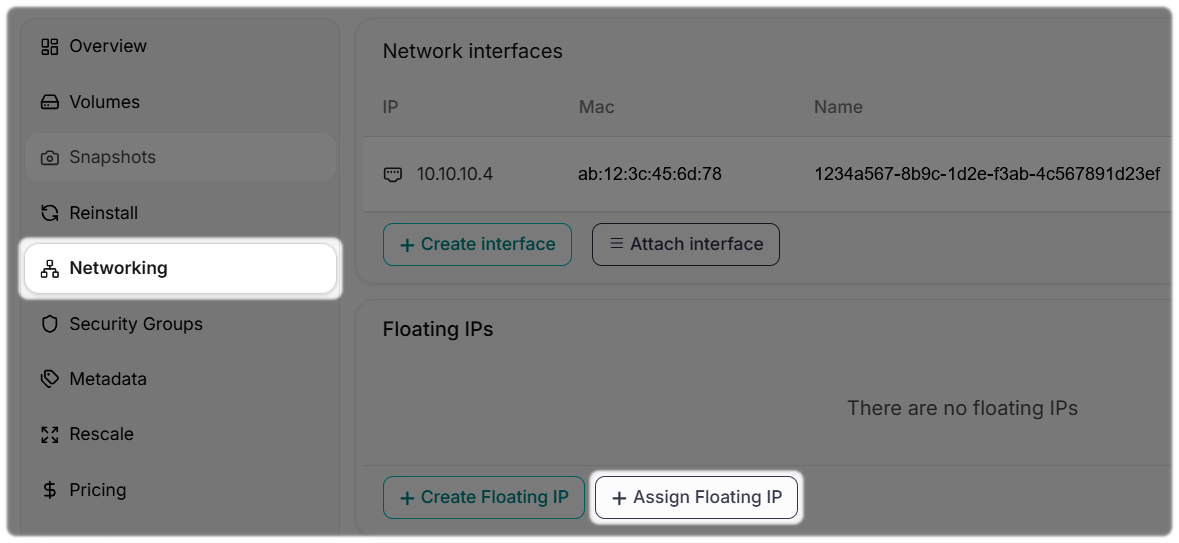
- Choose a value for the Floating IP
- Choose a value for the Port Server IP e.g.10.10.10.4
Security groups are applied to a server and act as the firewall rules, allowing specific connectivity on that servers port.
Note: When you create a server, you will be prompted to setup a Security Group (see section - Create a Server), you can create additional security groups if required.
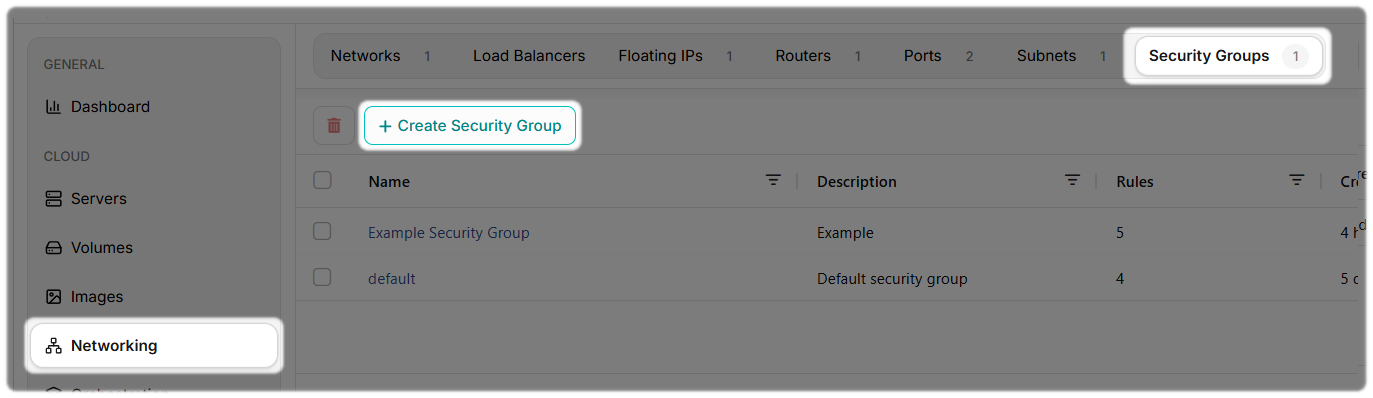
5.1: Creating Security Groups:
- Select Networking > Security Groups > Create Security Group
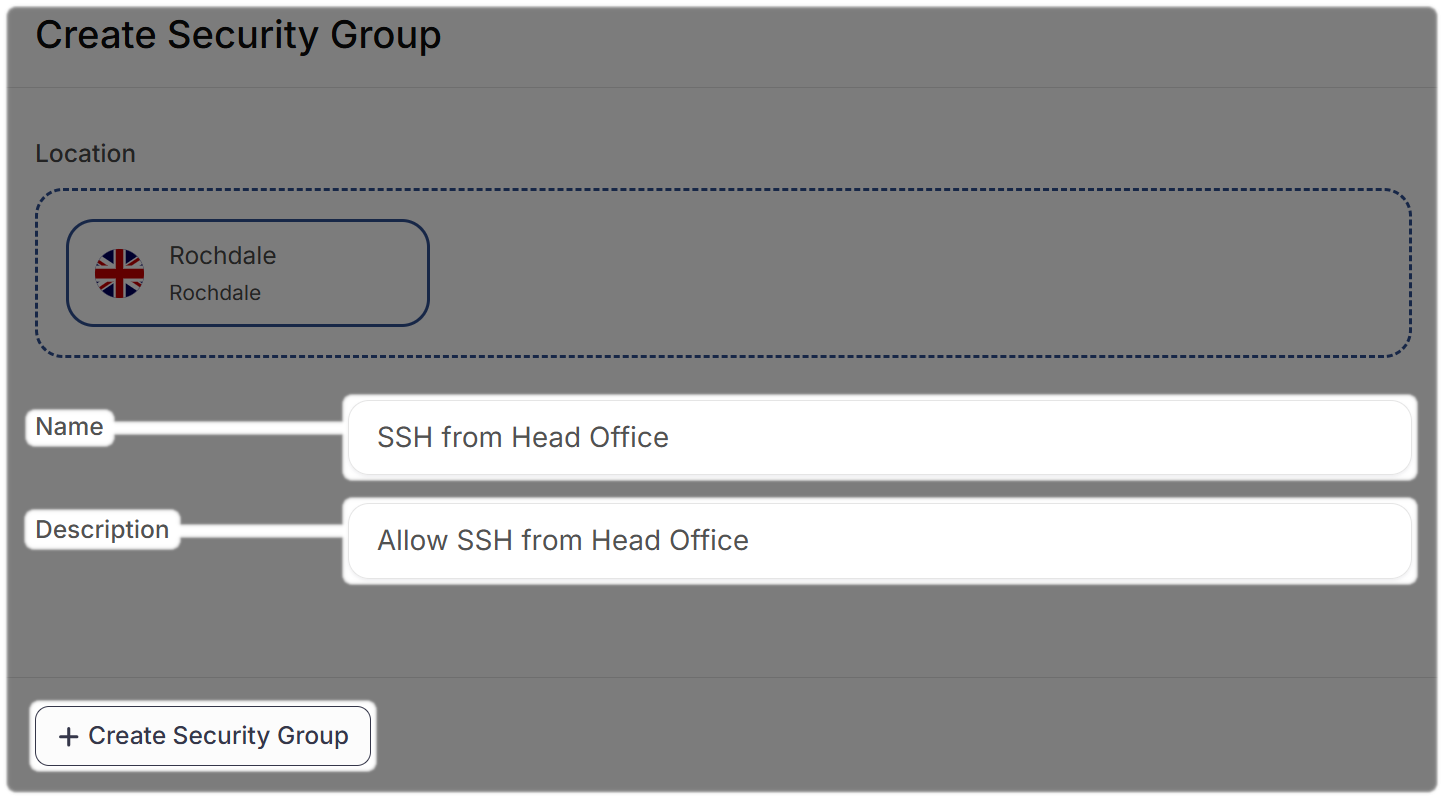
- Type a Name > Description then select Create Security Group e.g. SSH from Head Office
5.2: Adding Rules to a Security Group:
Next you will need to add rules to the group
- Select Networking > Security Groups > Security Group Name e.g. SSH from Head Office
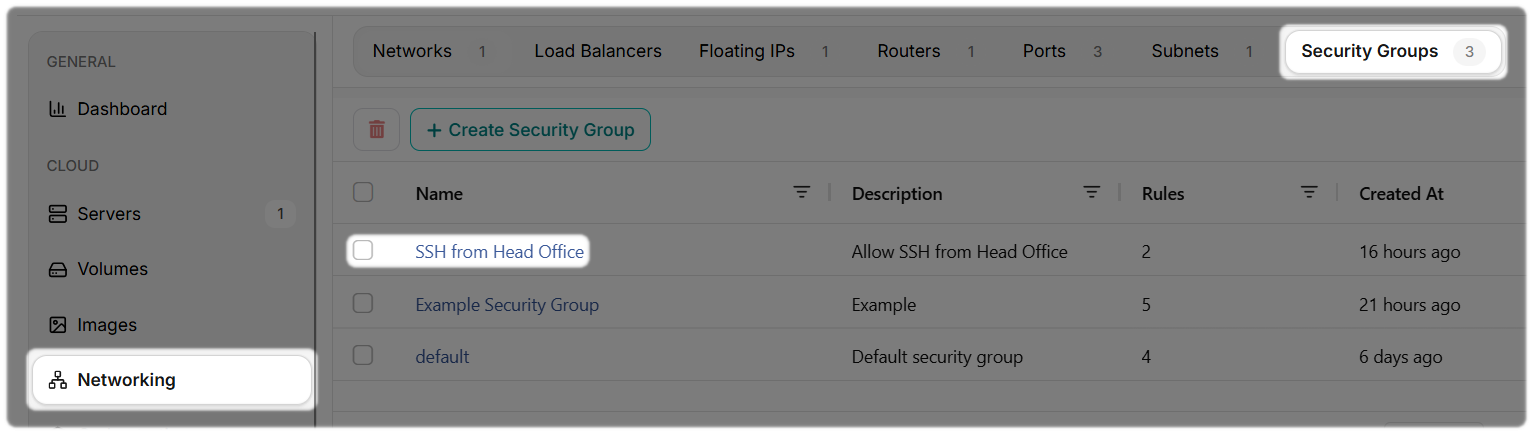
- Select Add Rule
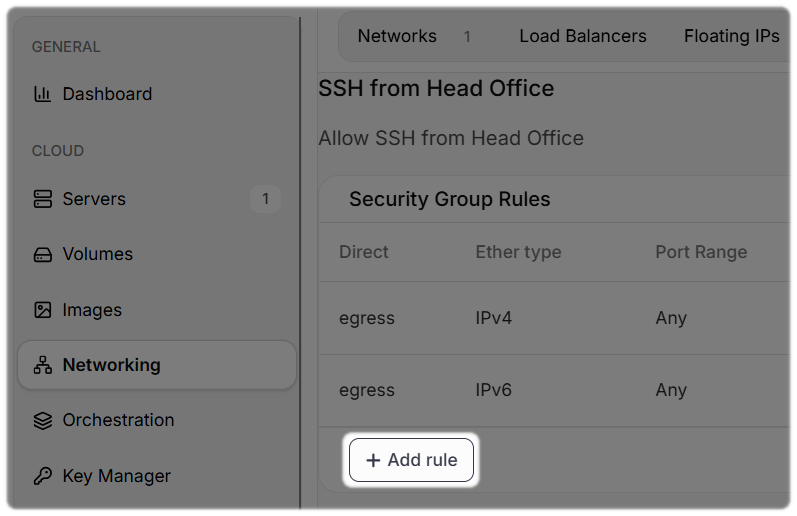
- Enter The required rule. below is an example from SSH from the head office
- NOTE: ensure the CIDR field is in / notation e.g. x.x.x.x/24
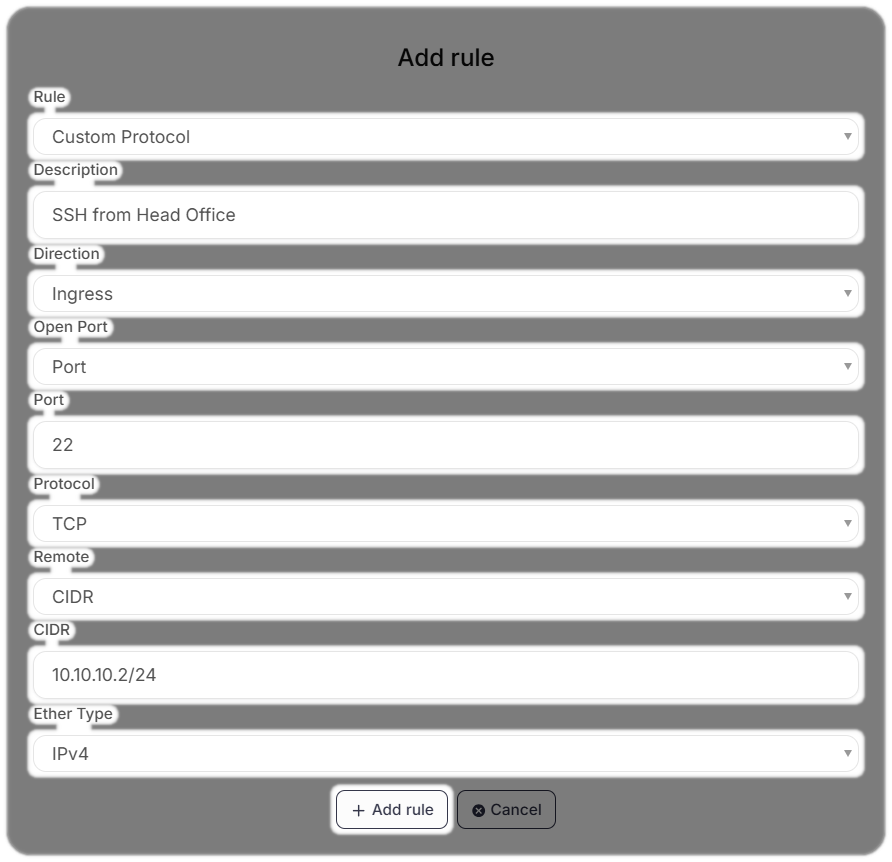
- Once you have entered your rules for the Security group select Add Rule
- Add any additional ingress rules or enter more restrictive egress rules if needed as it defaults to allowing everything out.
5.3: Assigning Security Groups:
- Select Servers > Server Name
- Then select Security Groups > Add Security Group
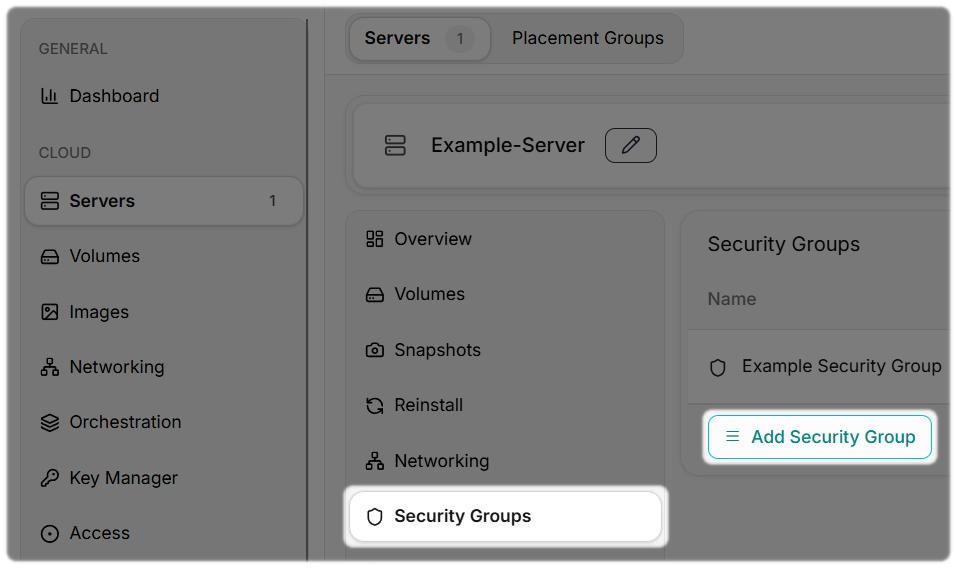
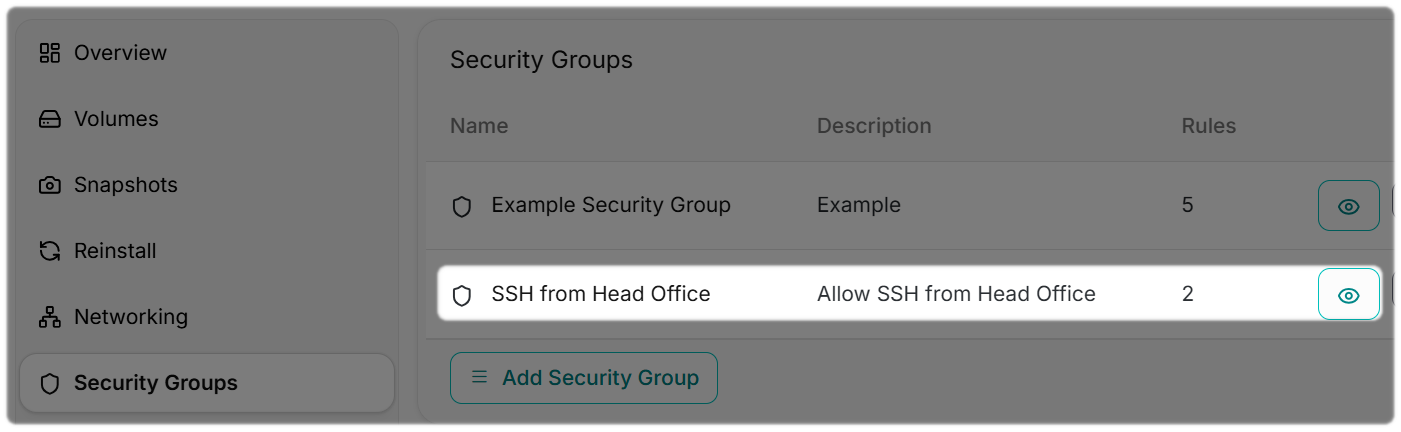
- Select the security group name from the drop down e.g. SSH from Head Office > Add Security Group
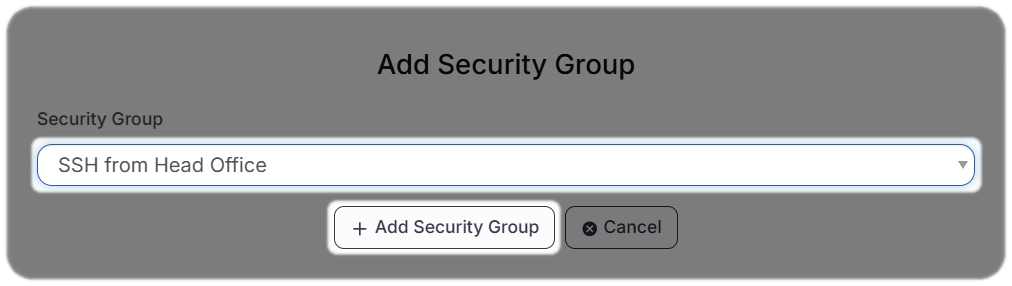
Once added, you should now see the Security Group.
Need Help?
Feel free to email cloud@zen.co.uk.